【Flowchart Mode】How to scrape data by entering keywords in batches | Web Scraping Tool | ScrapeStorm
Abstract:This tutorial will show you how to scrape data by entering keywords in batches on a website in flowchart mode. No Programming Needed. Visual Operation. ScrapeStormFree Download
Step 1: Create a new task
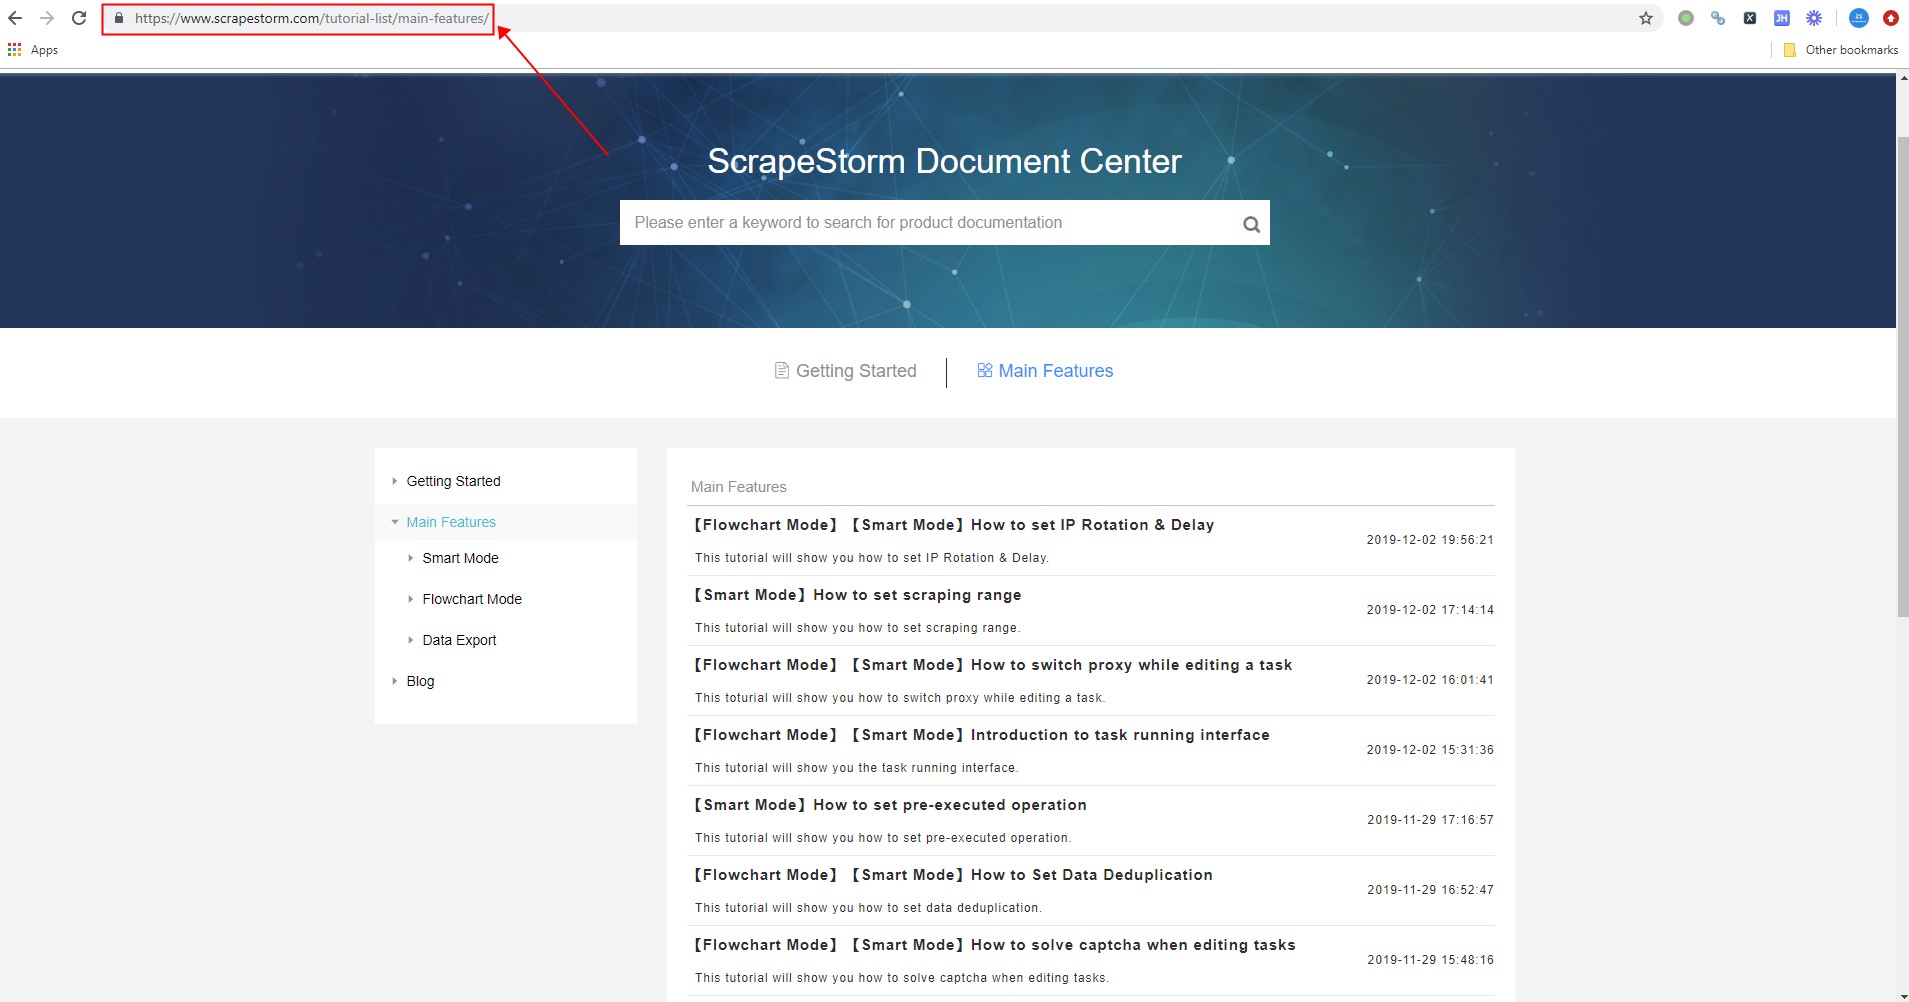
1. Copy the URL of the webpage (the URL of the search result page, not the URL of the homepage).
Click here to learn about how to enter a correct URL.
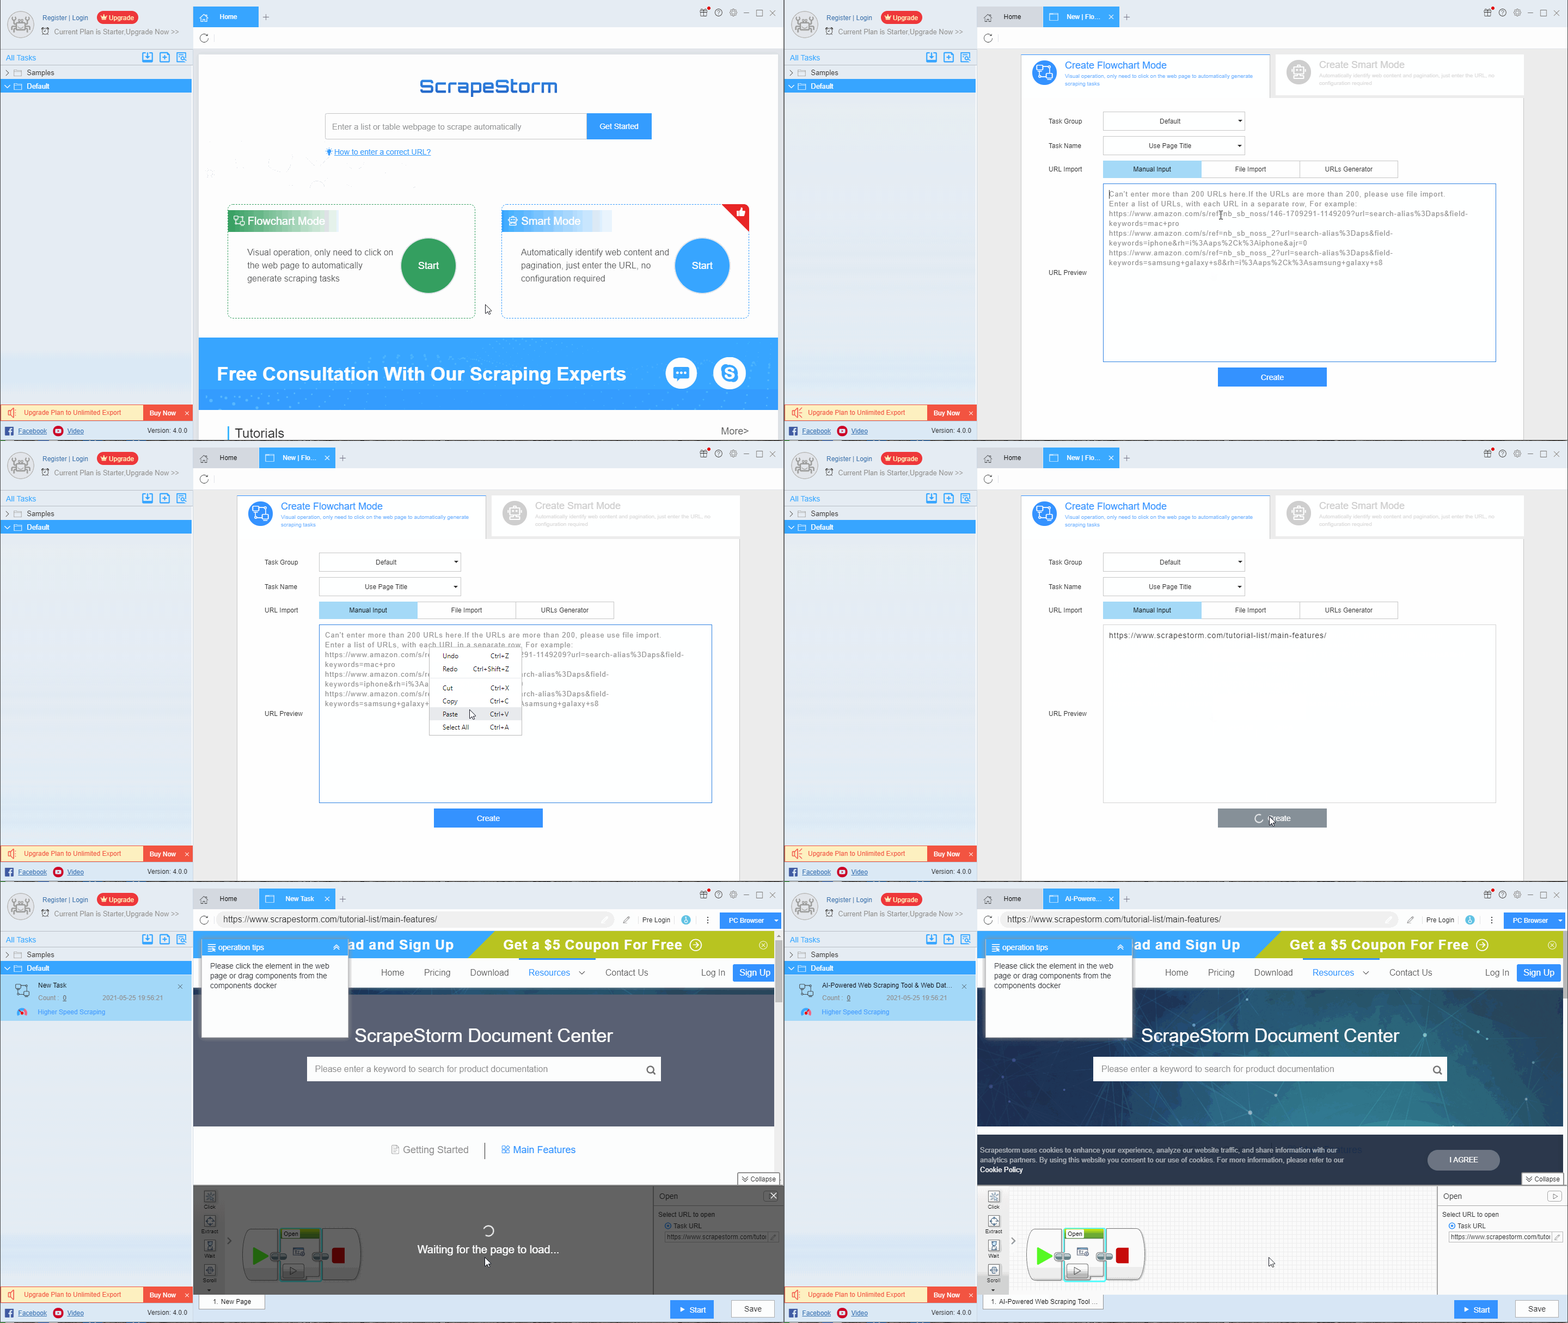
2. Create a new flowchart mode task
You can create new tasks directly on the software, or import tasks.
Click here to learn how to import and export scraping tasks.
Step 2: Configure scraping rules
1. Set a loop of multiple keywords
After entering the URL to create a new task in the flowchart mode, click the search box, and then enter the text in the operation tips.
Click here to learn more about the input text component.
Since we need to enter data for multiple keywords, we choose to click \”input text list”\.
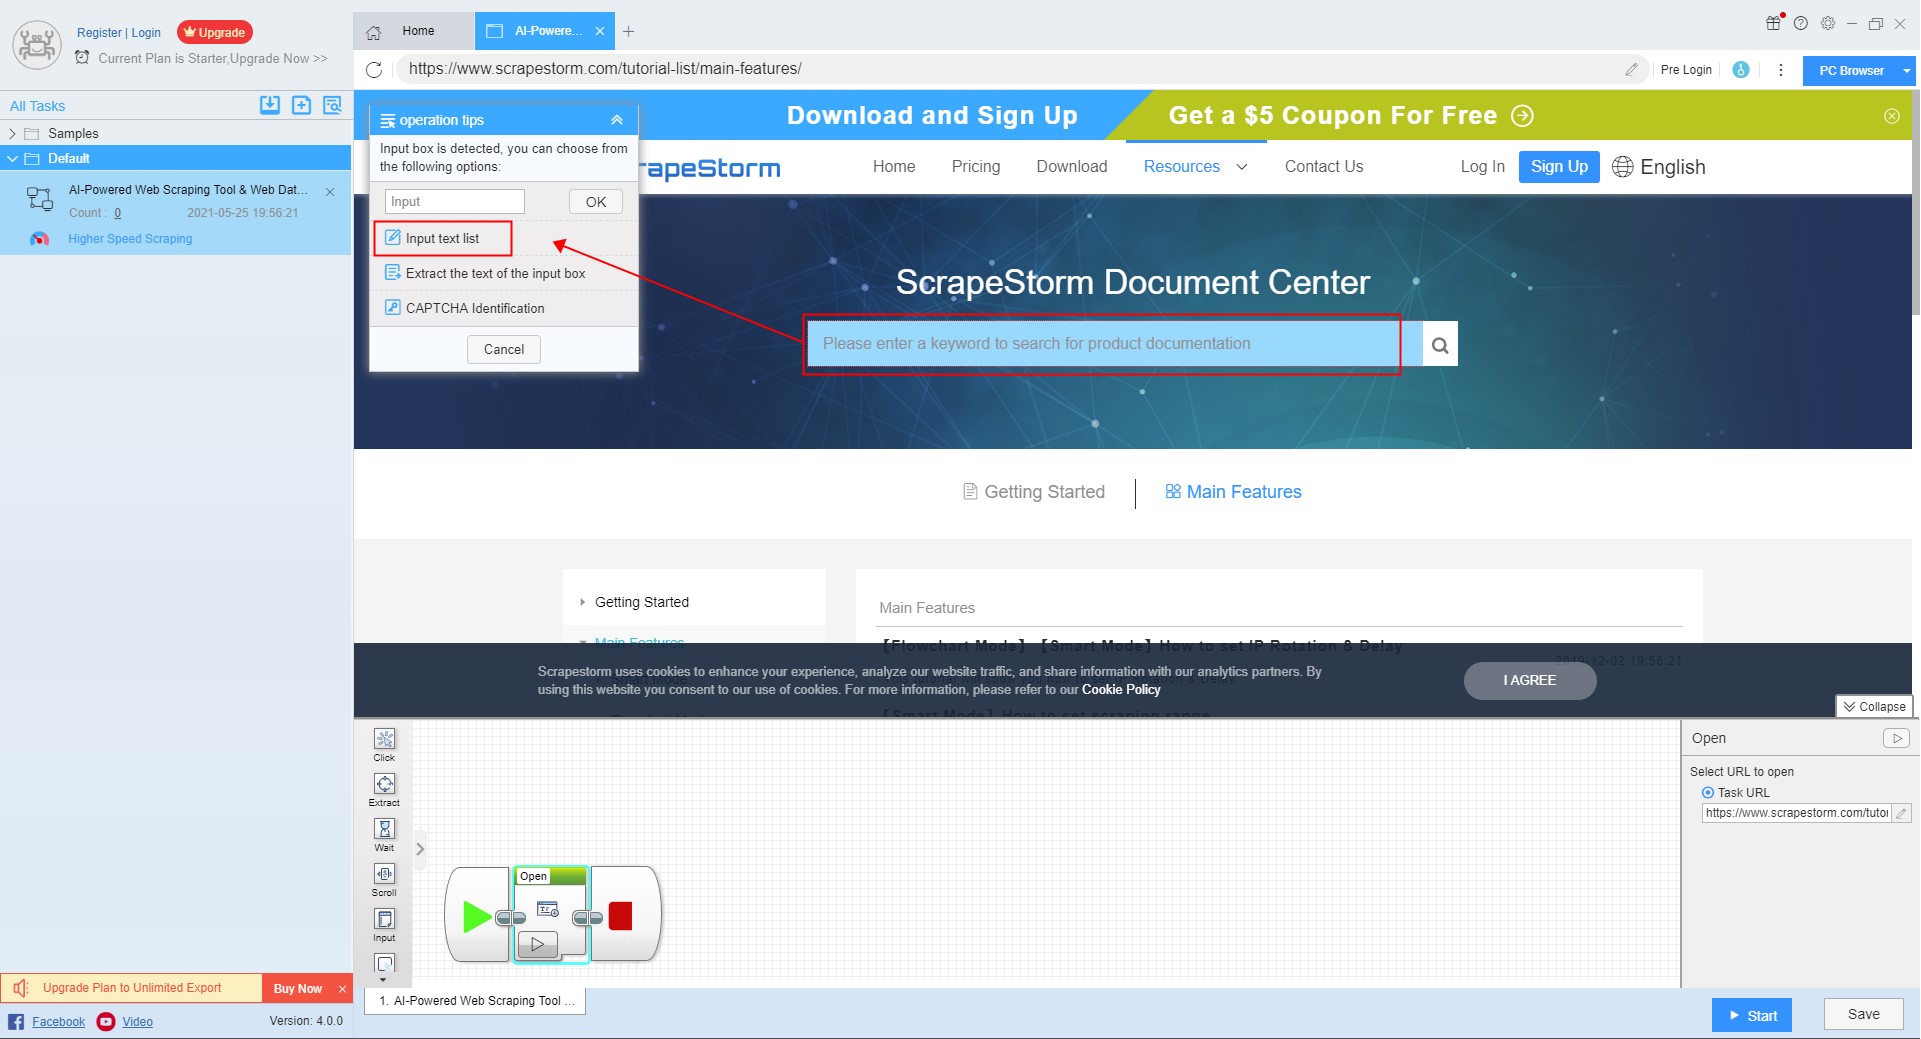
Then select \”Single text list”\.
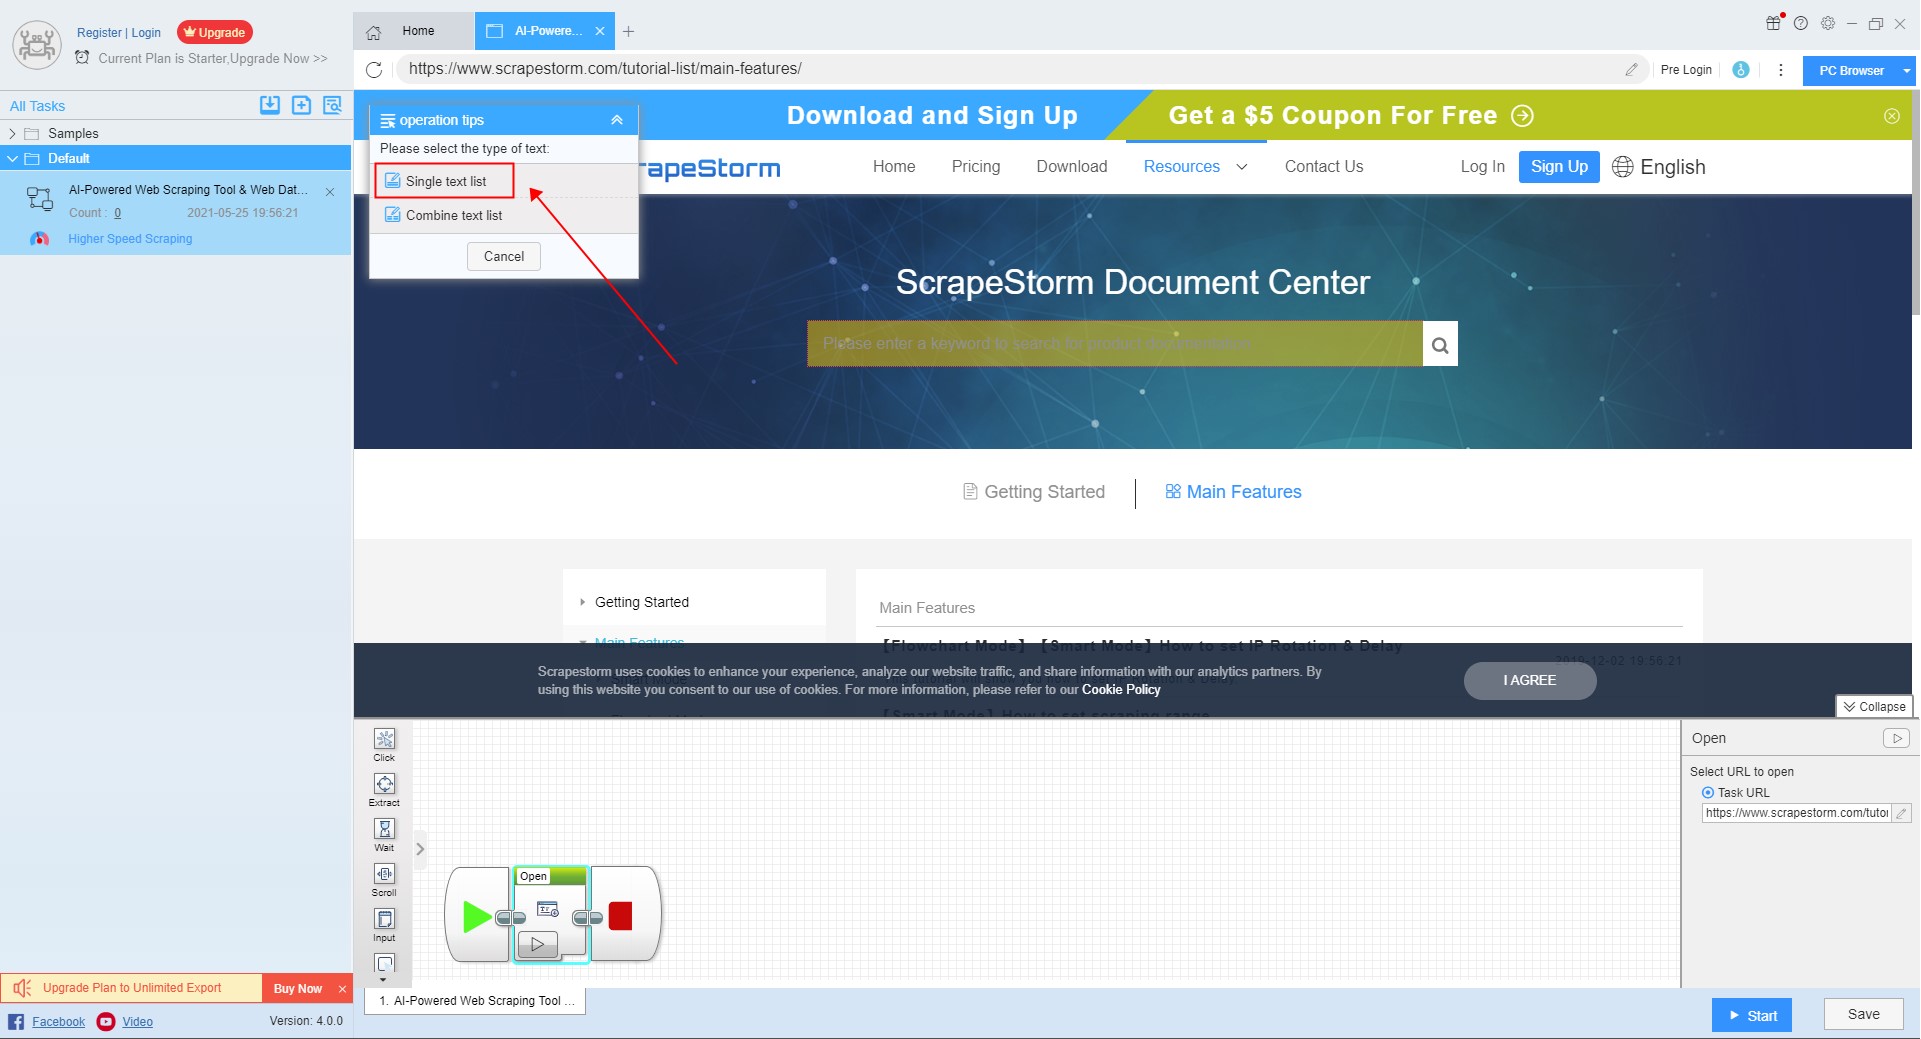
Then enter the text that needs to be set in the pop-up text list.
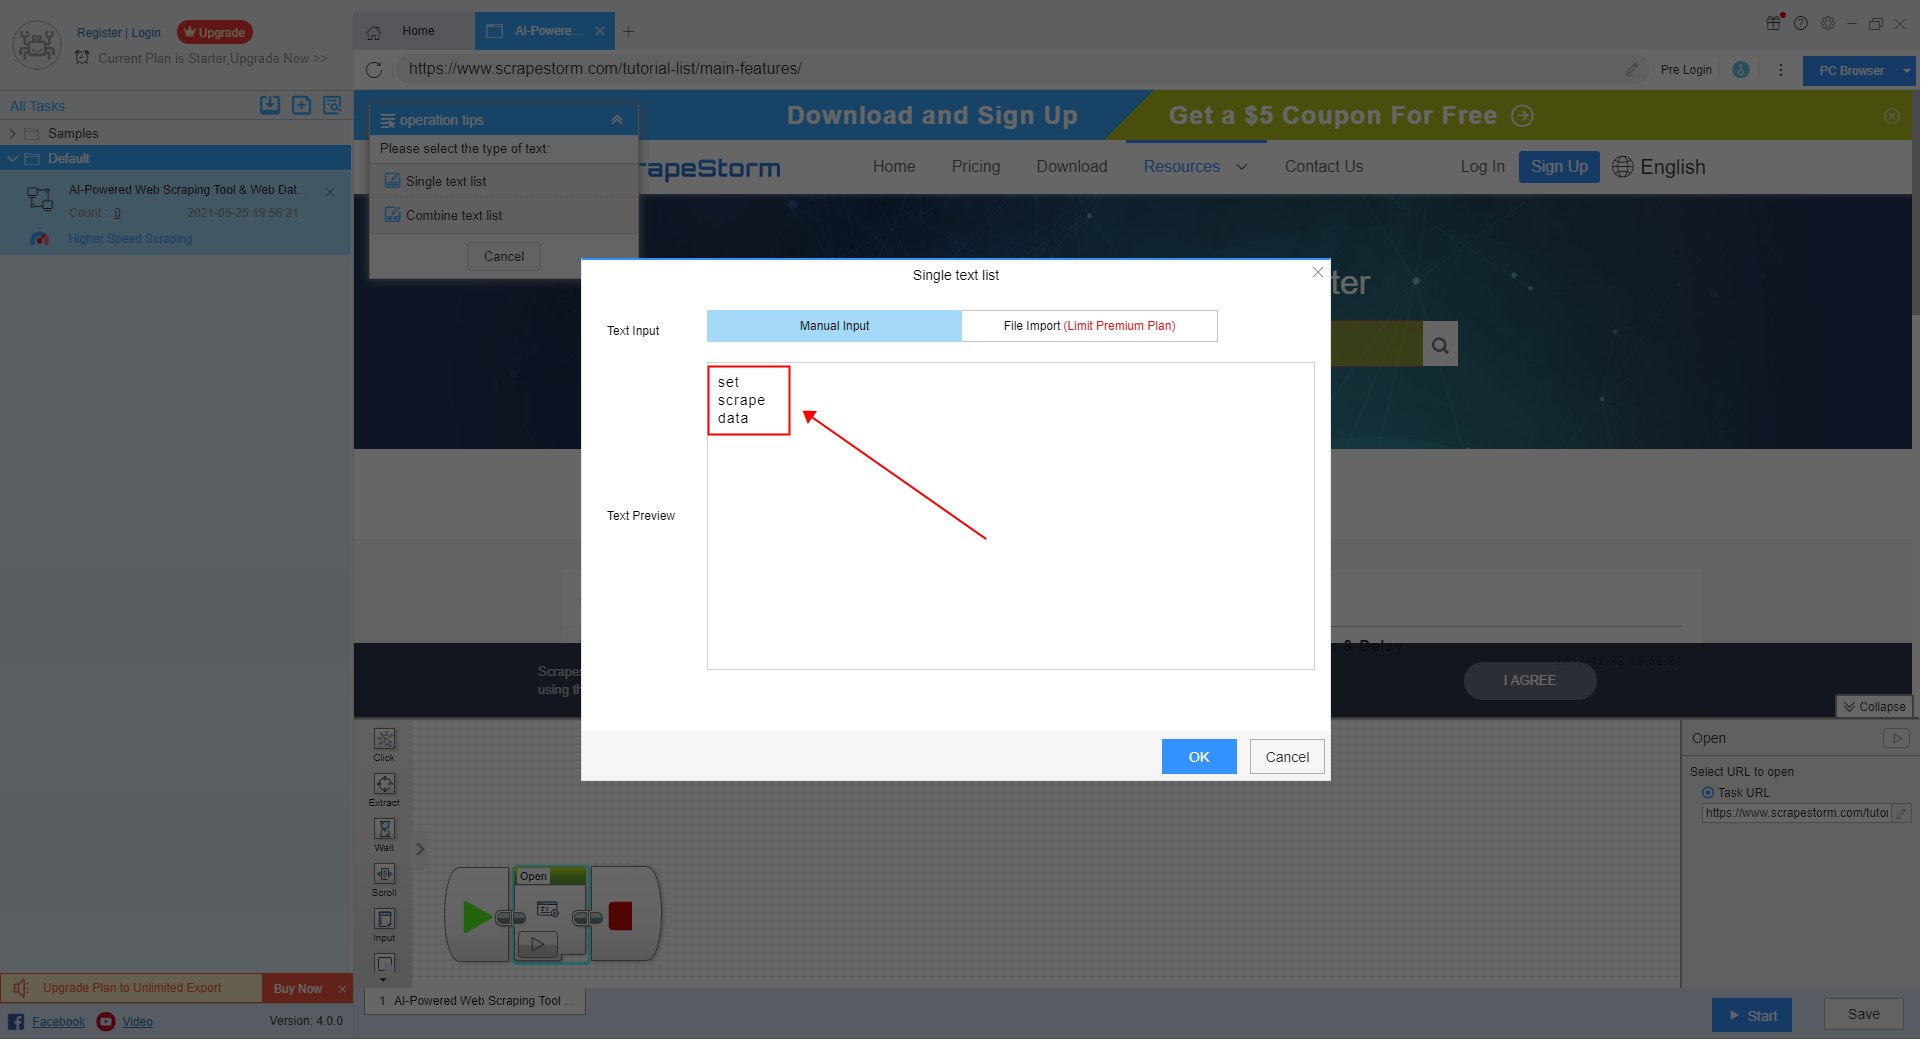
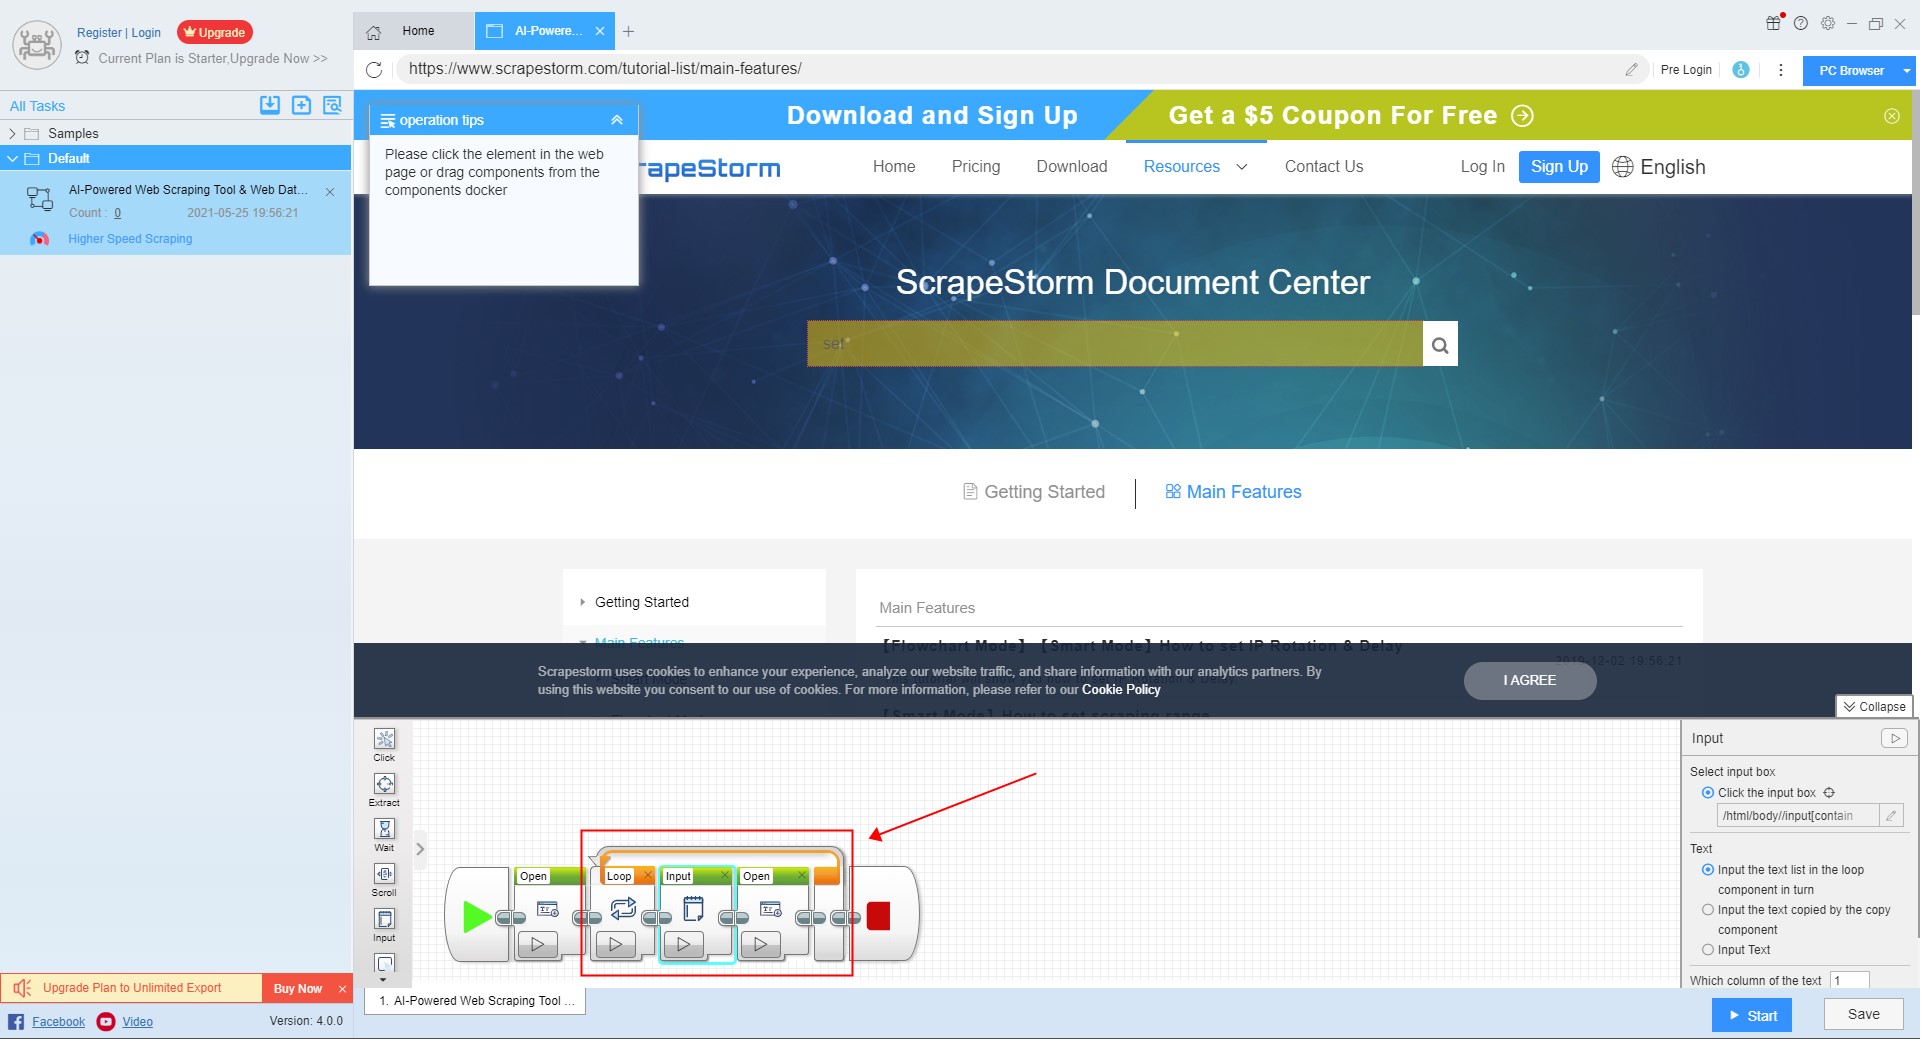
After clicking the “OK” button, the software will automatically generate a keyword loop.
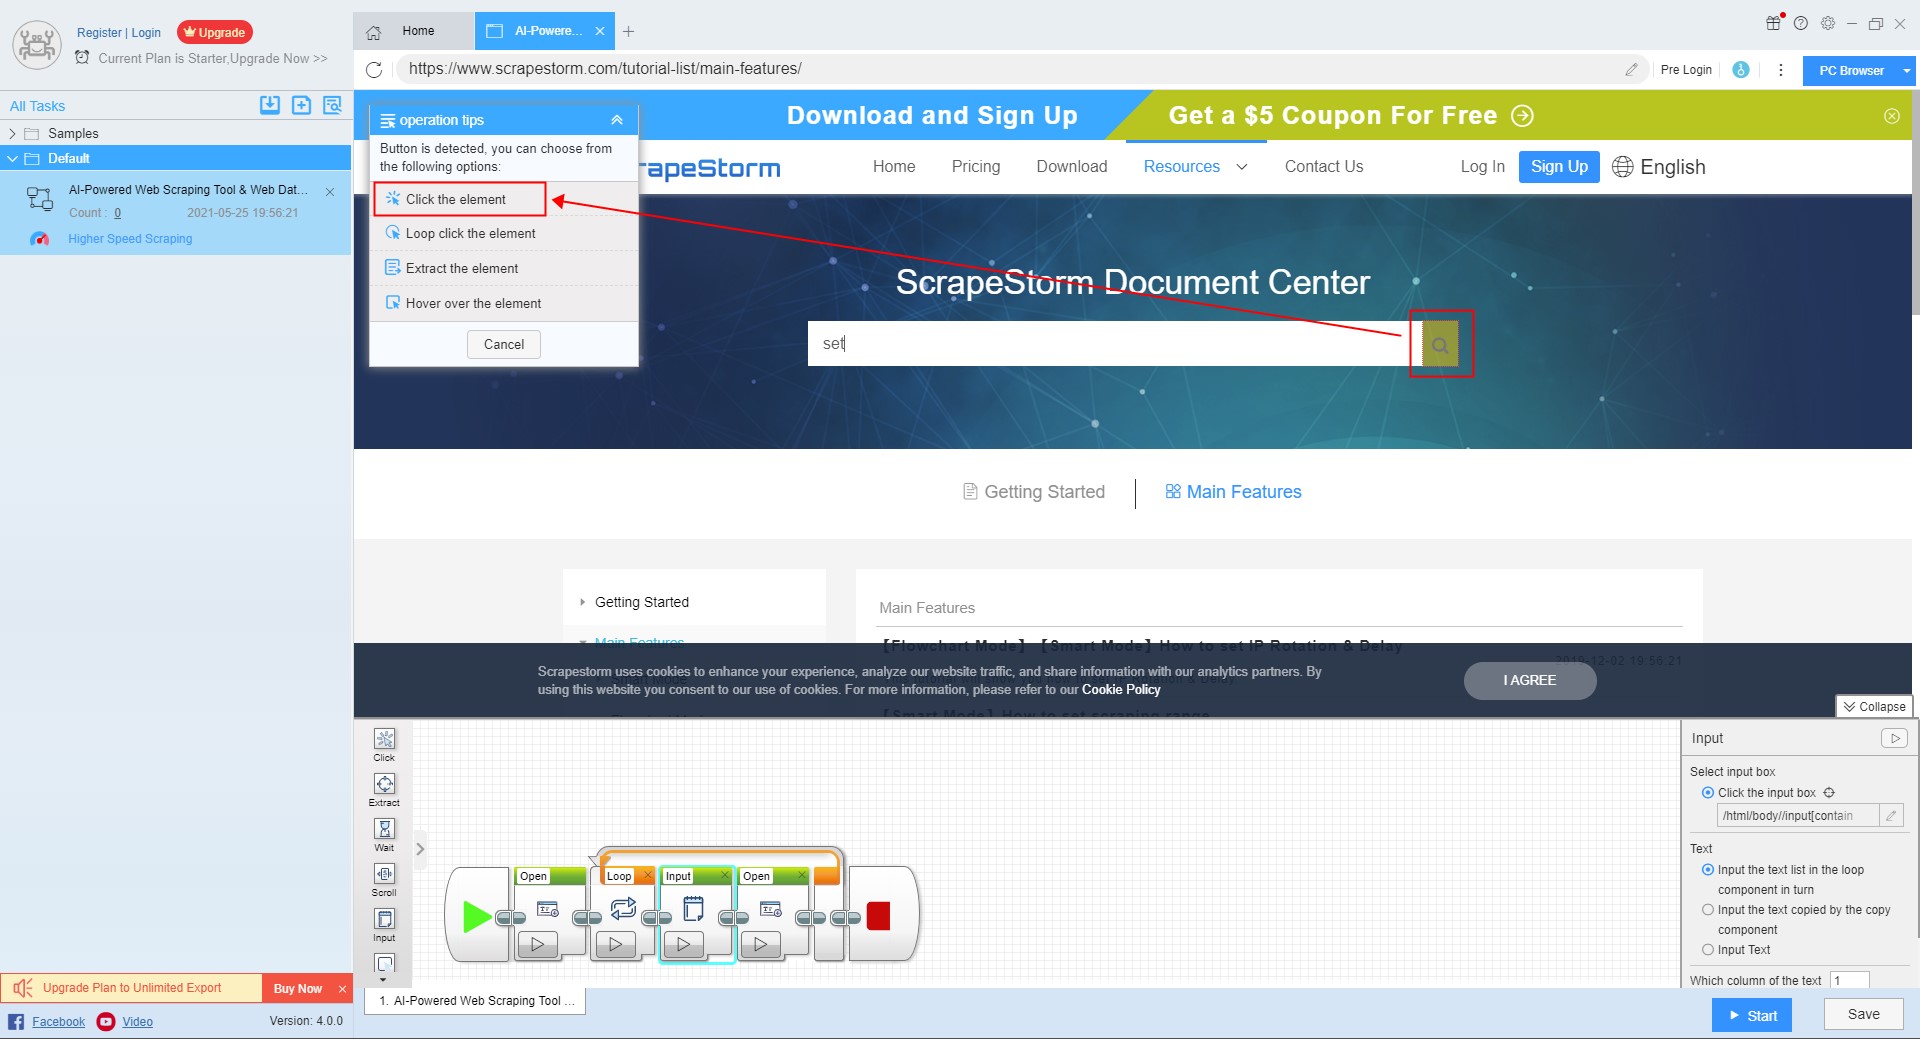
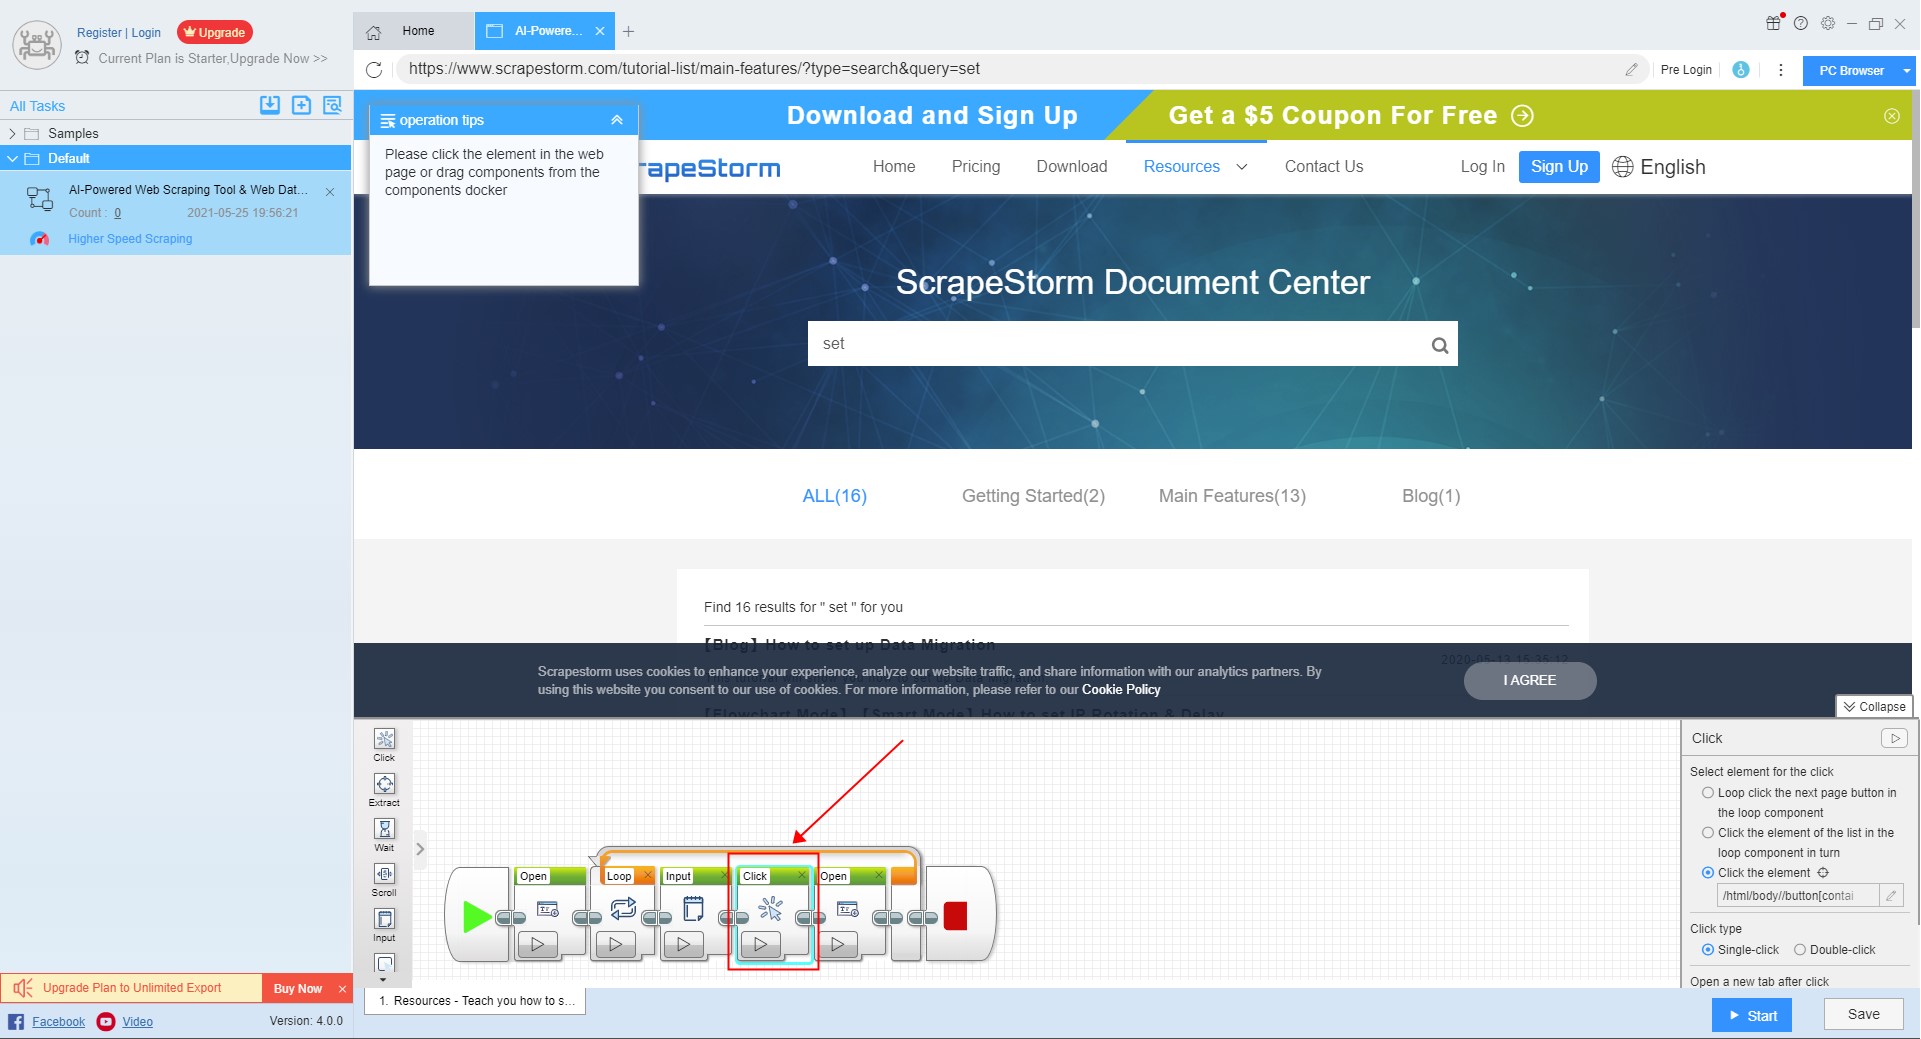
Then click the search button, and select the \”click the element “\ in the operation tips to jump to the search result page.
2. Set the scraping field
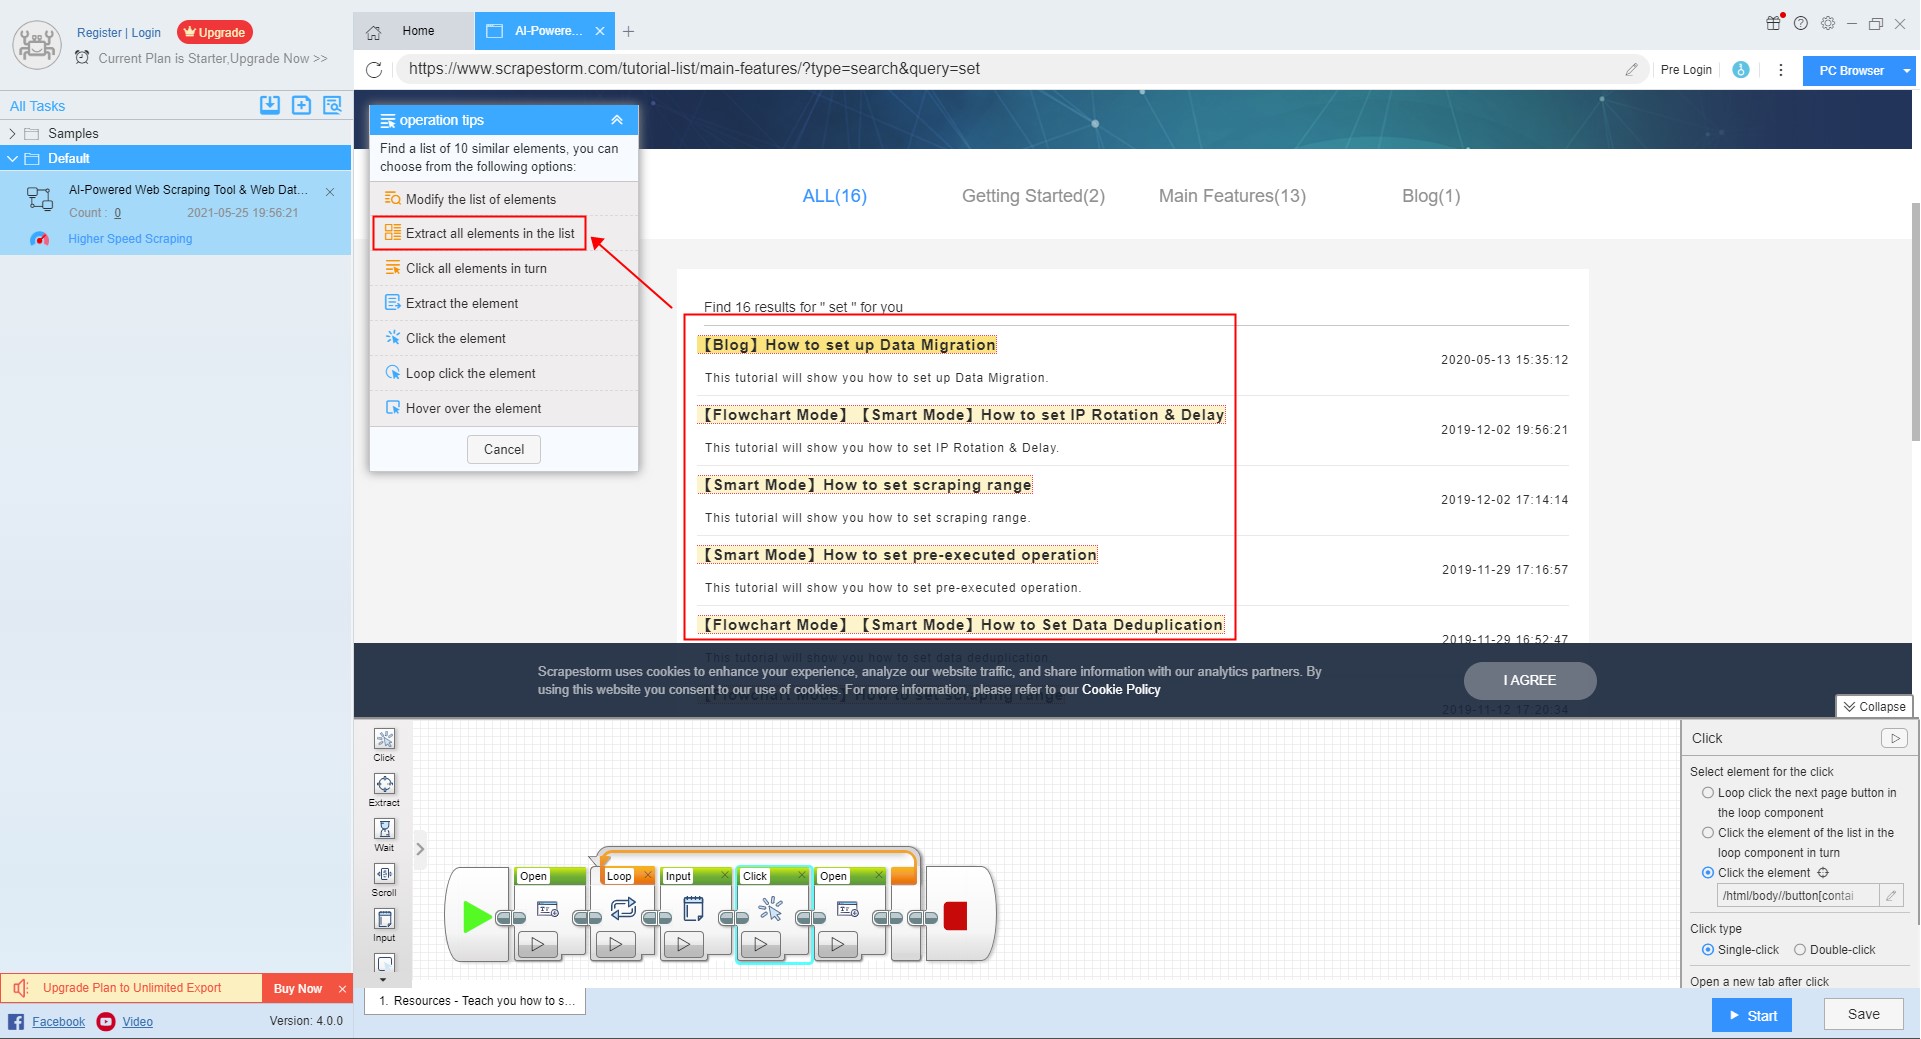
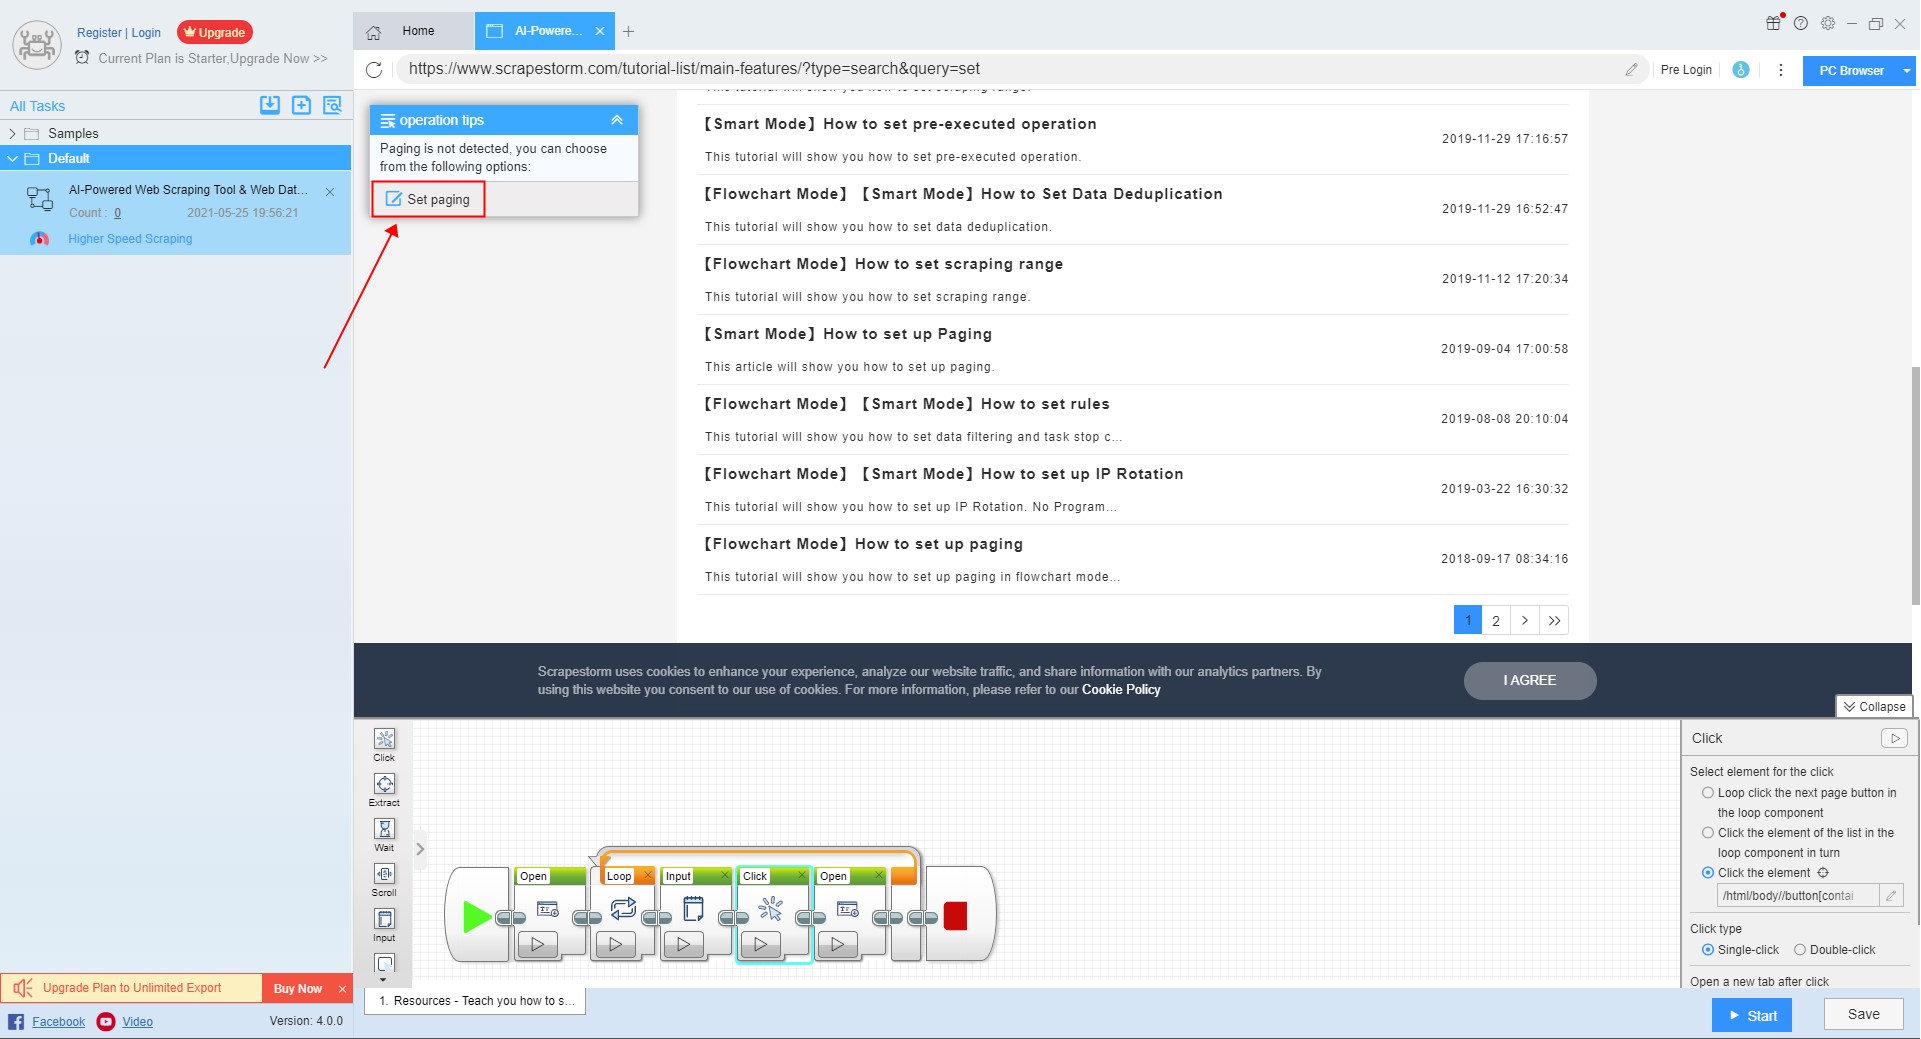
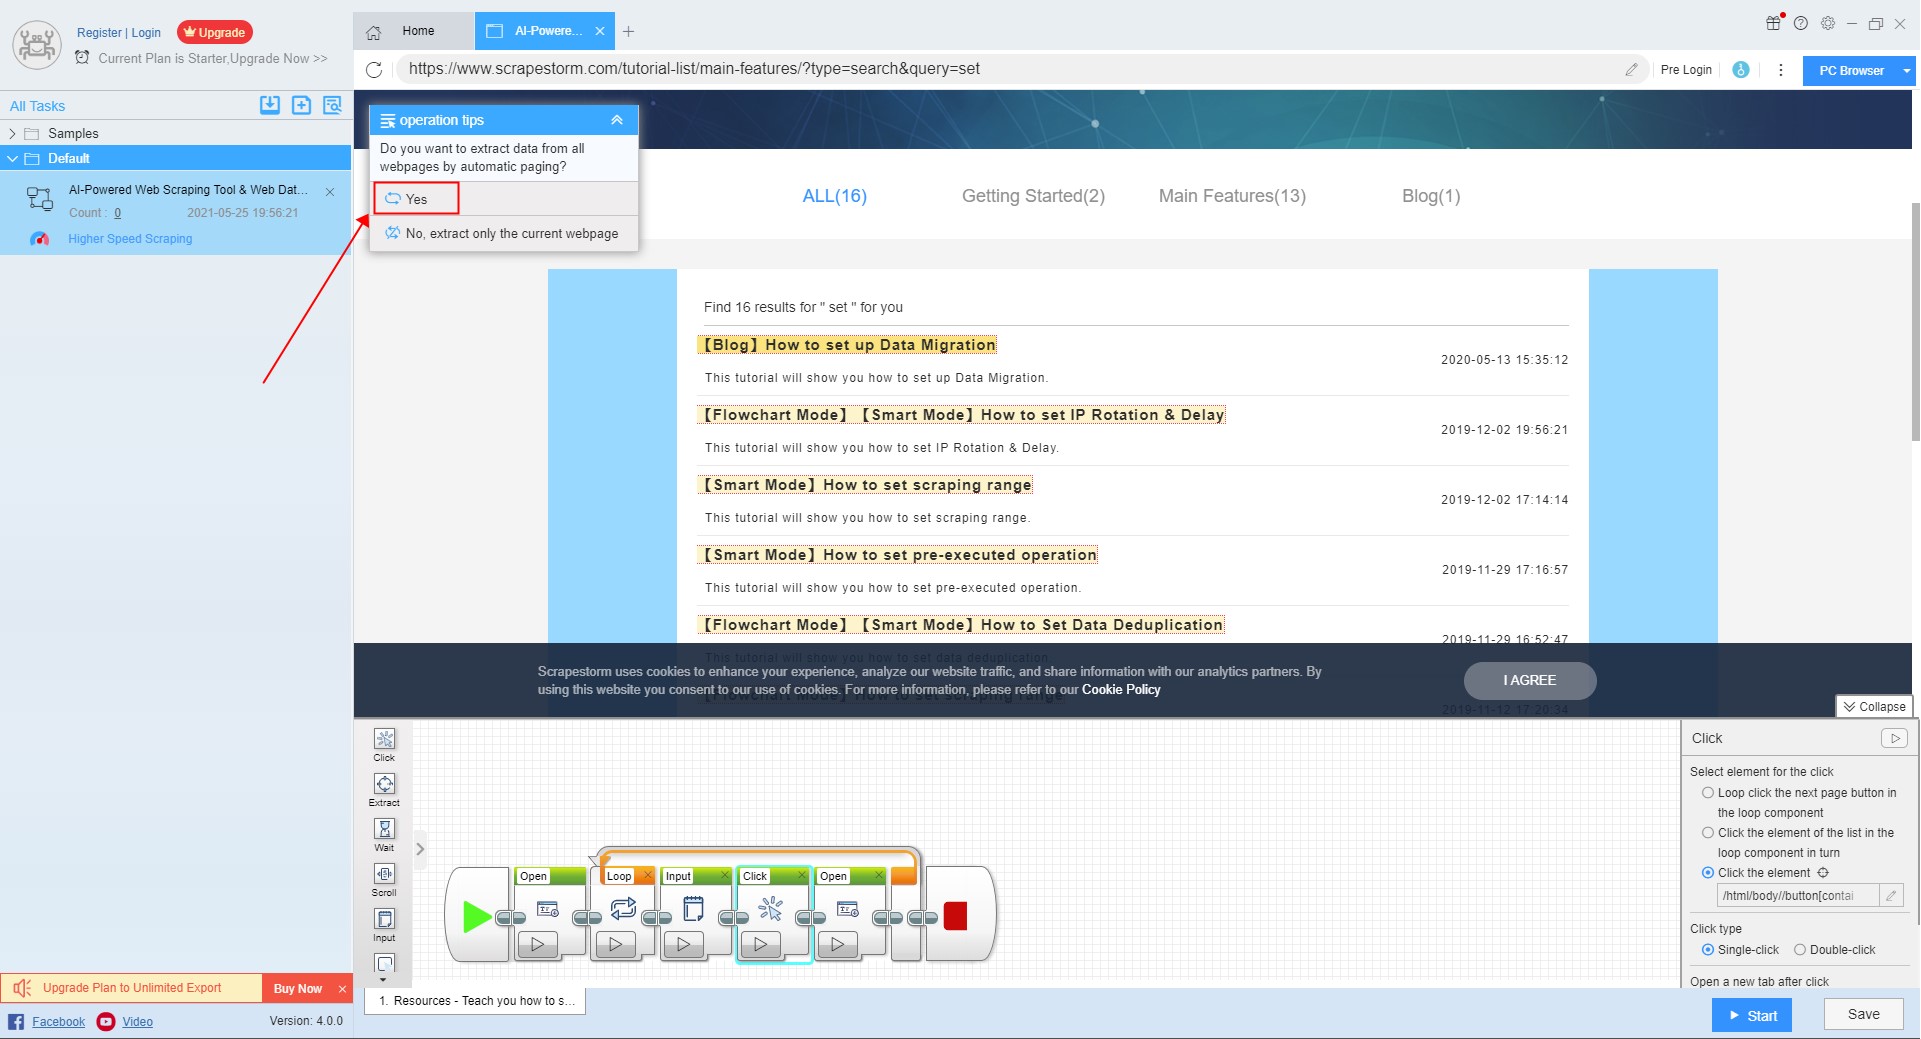
Set the fields to be extracted, click on the field on the webpage, and select \”Extract all elements in the list”\ in the operation tips. Then the software will automatically detect the paging, follow the prompts to set the paging.
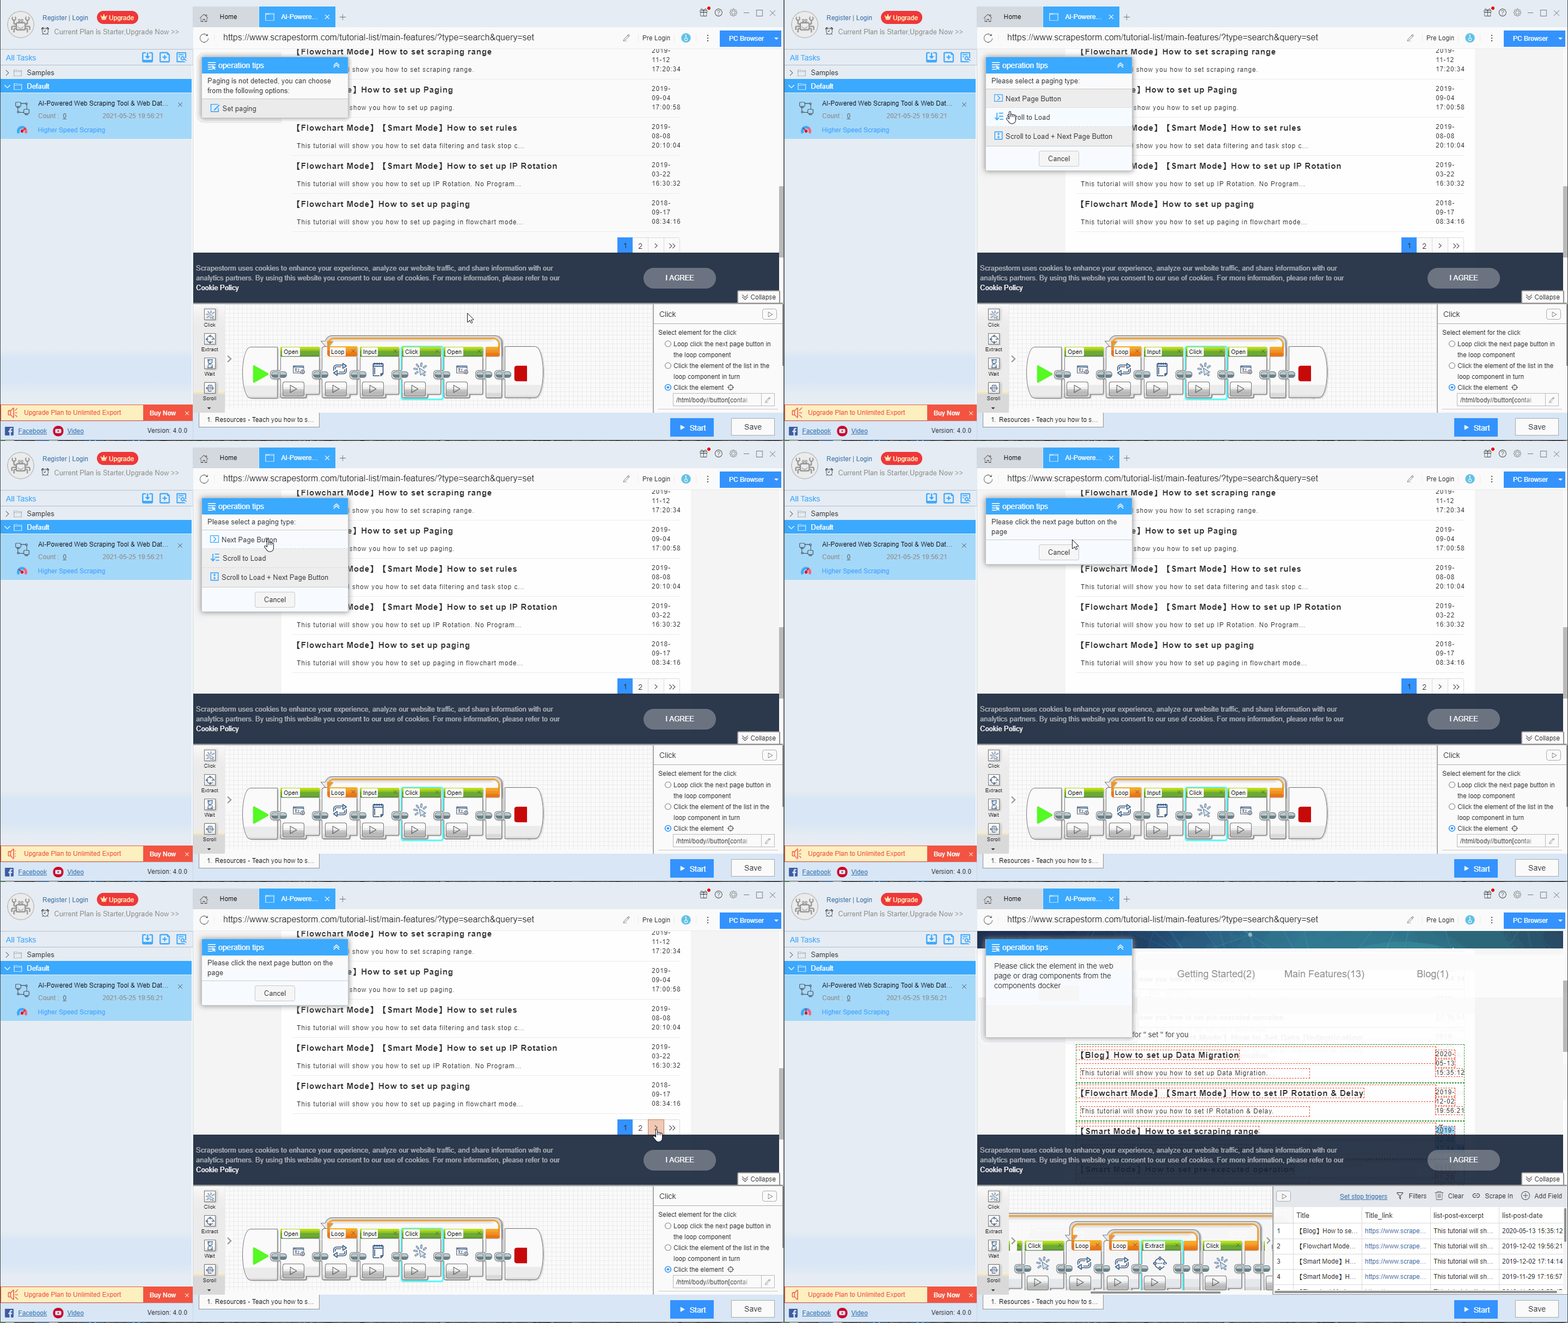
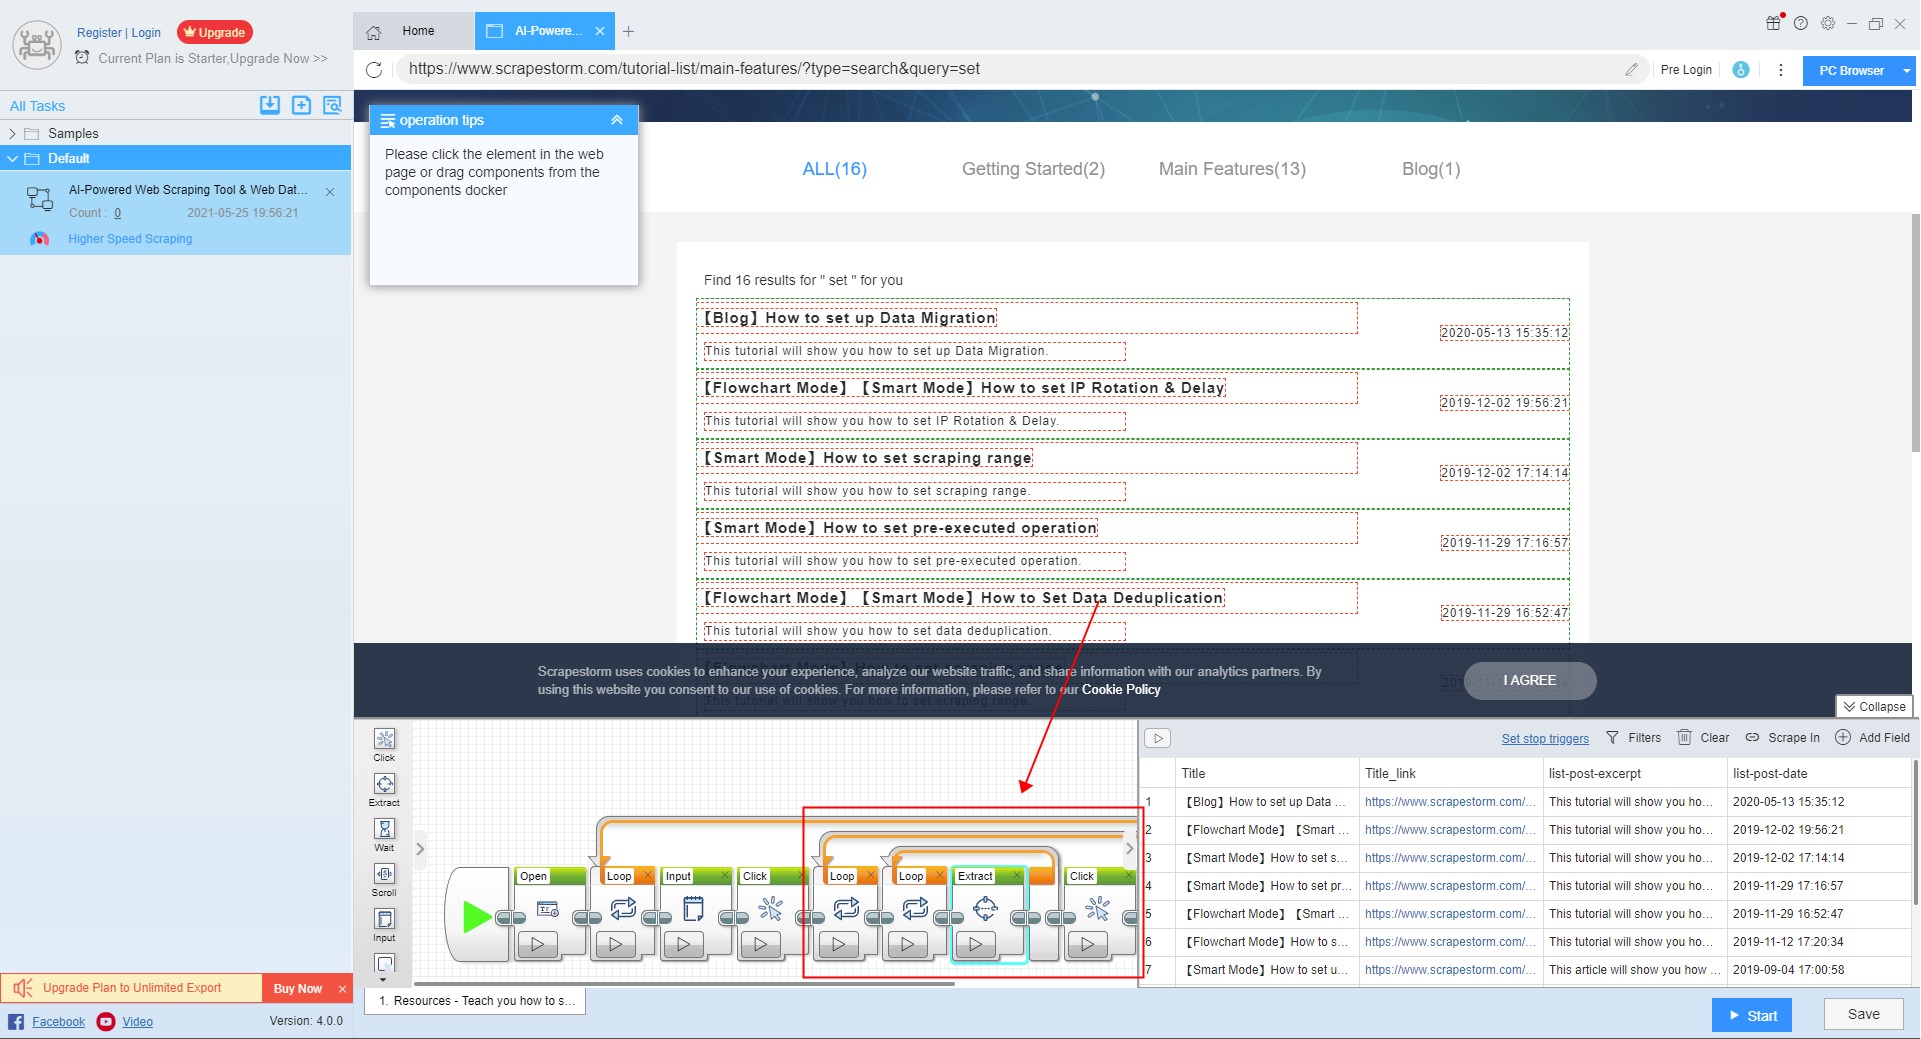
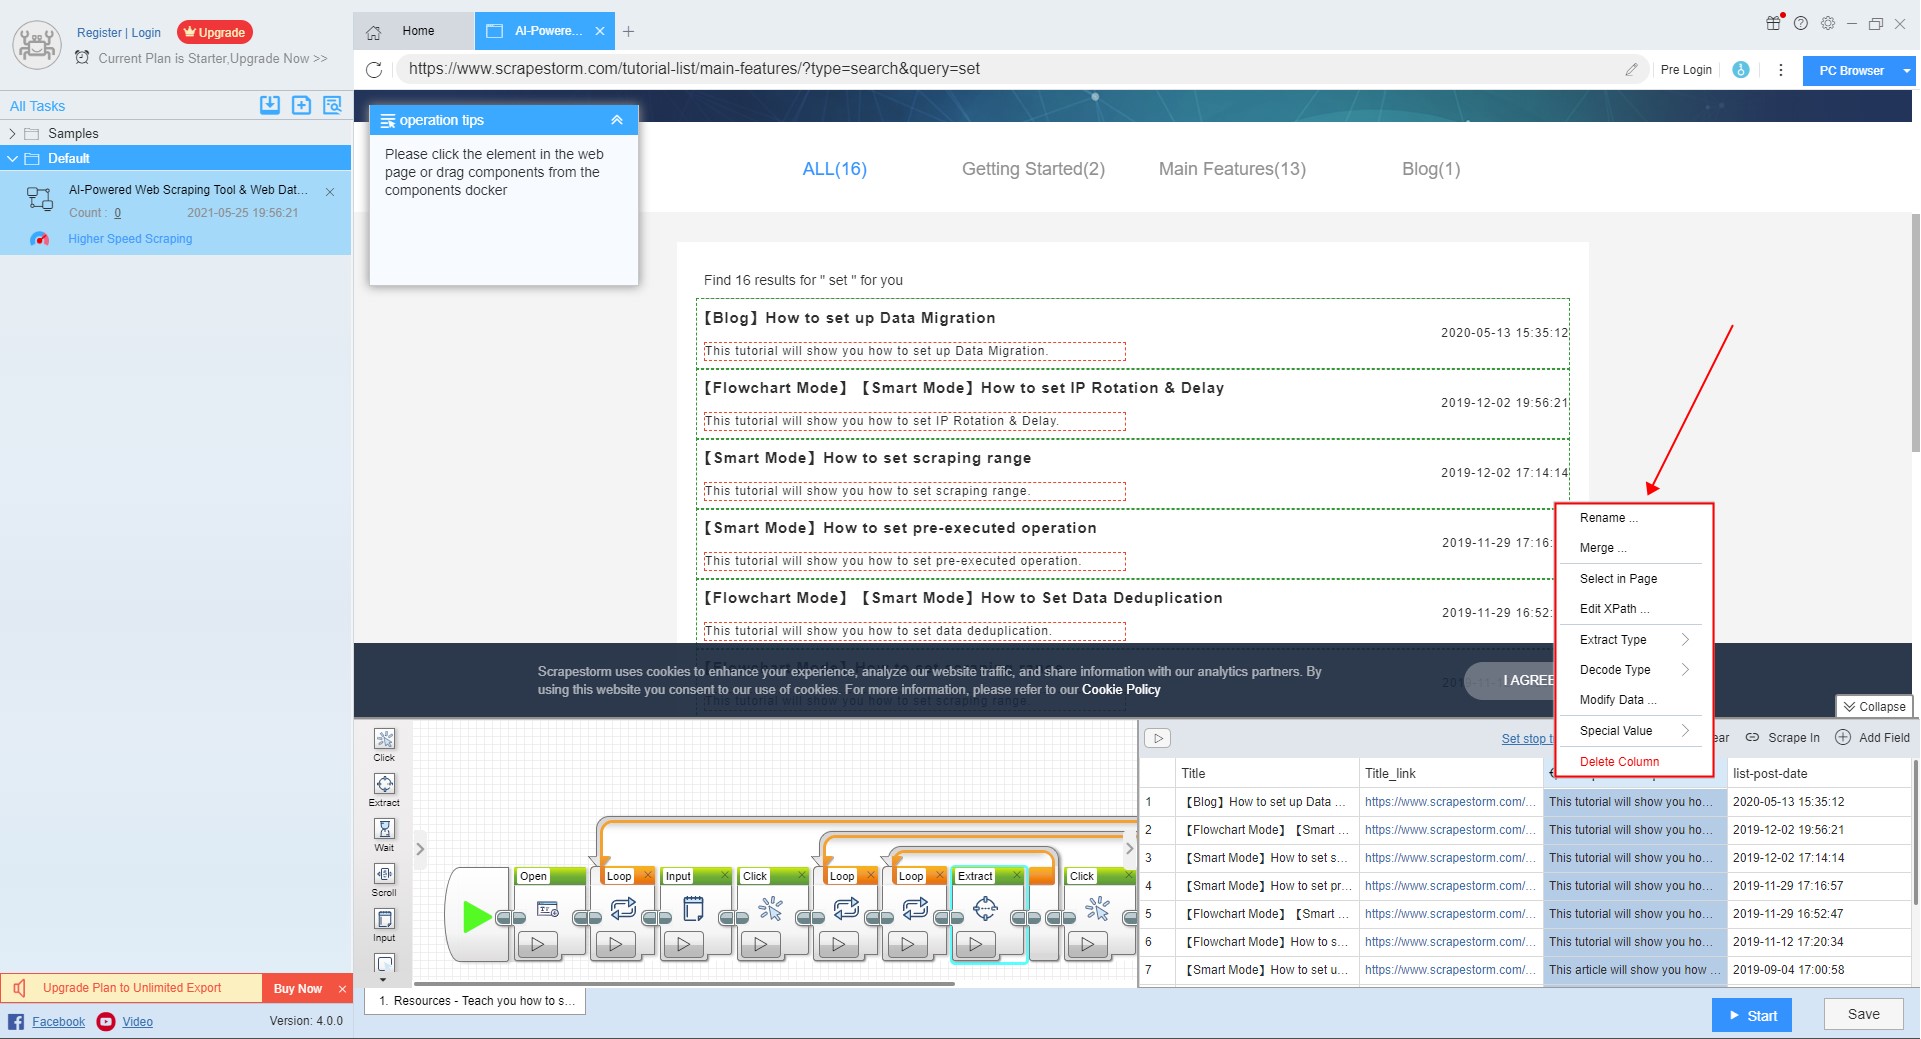
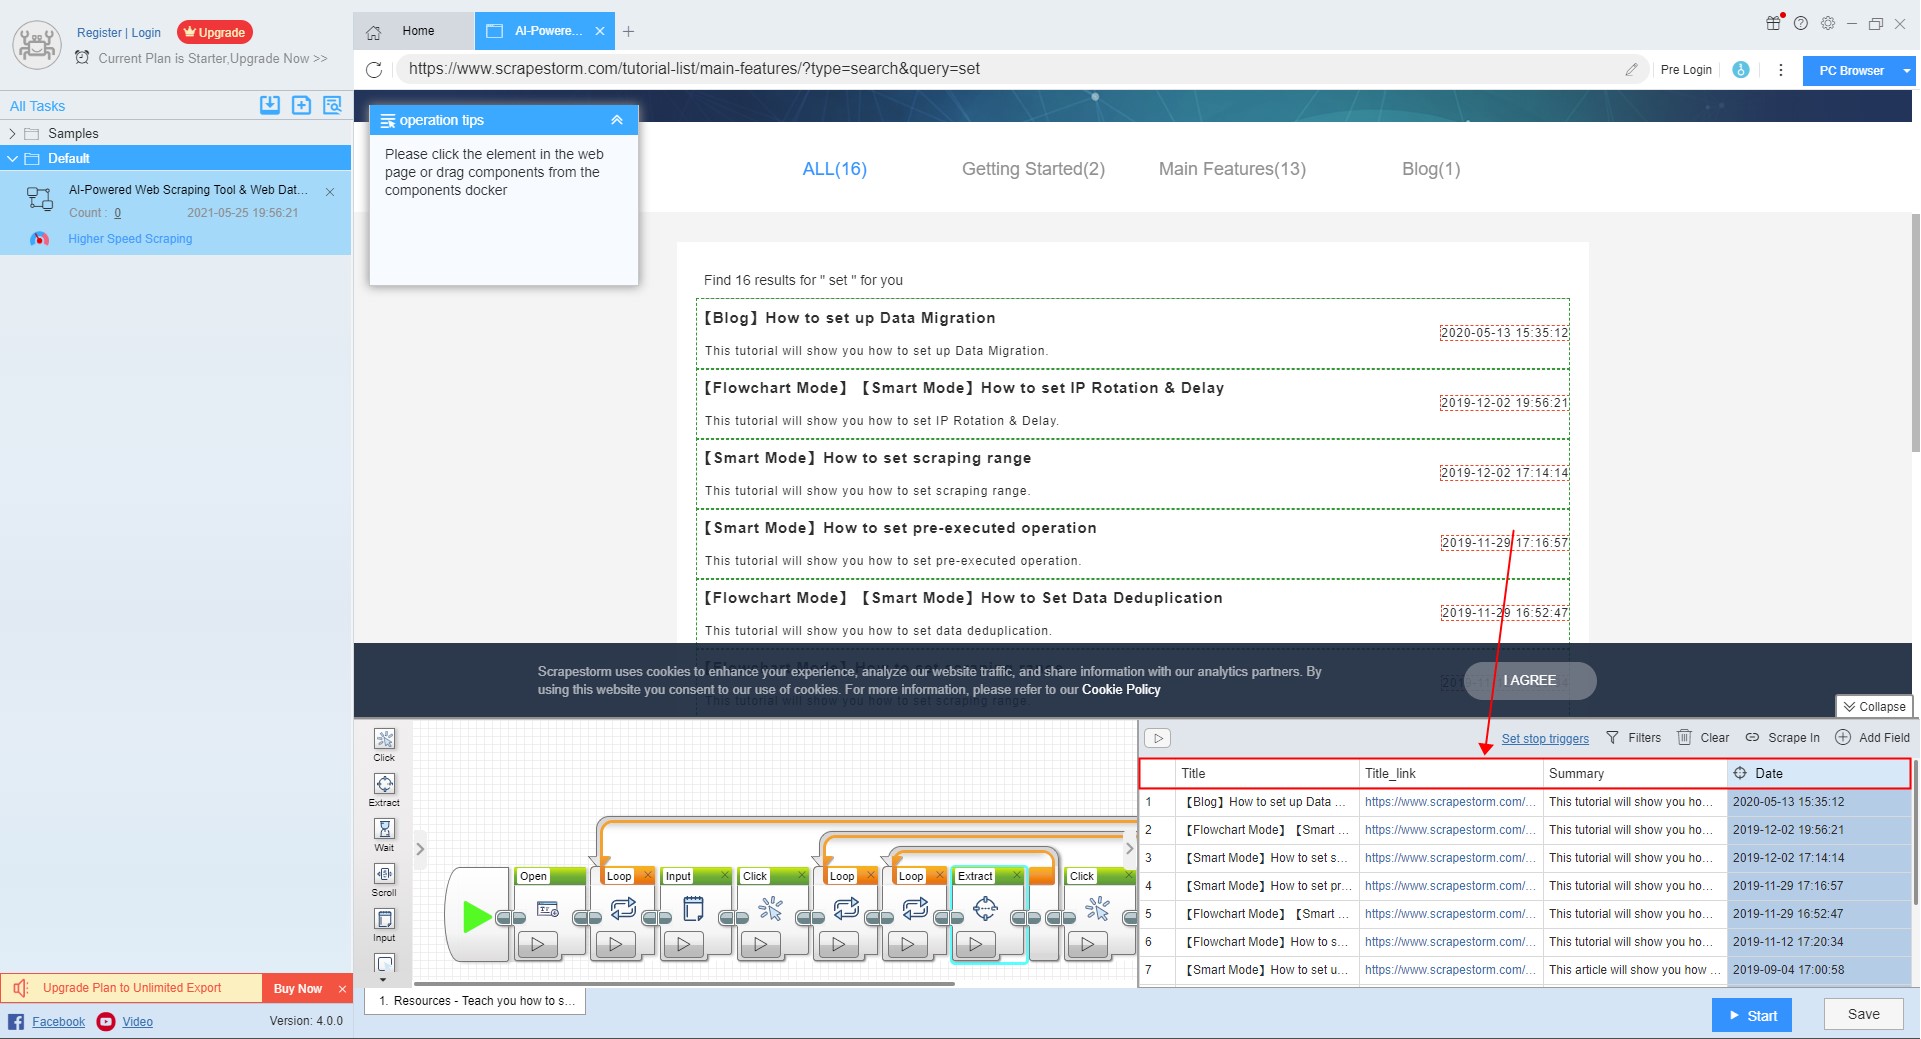
Then set the field on this basis, you can set it according to your own needs.
For more details, please refer to the following tutorial:
3.Scrape In
If you need the data of the detail page, you can use \”Scrape In”\.
For more details, please refer to the following tutorial:
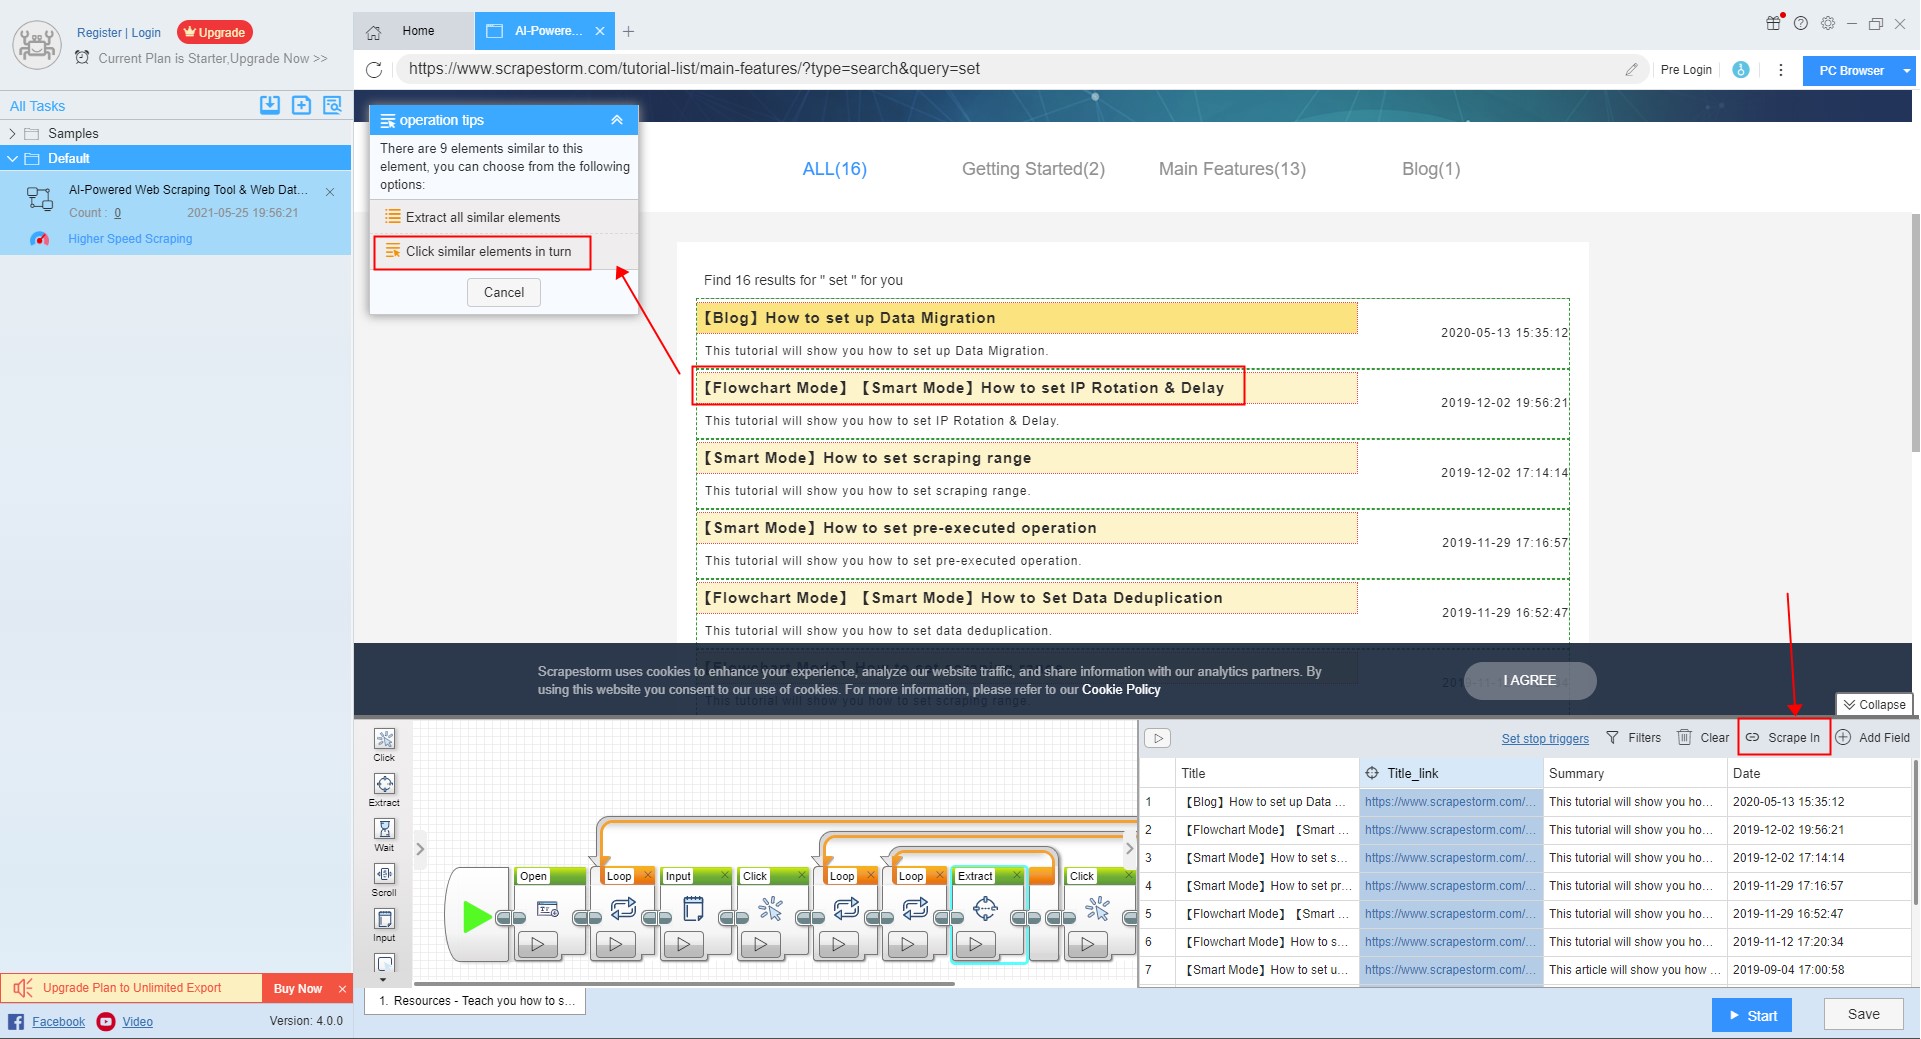
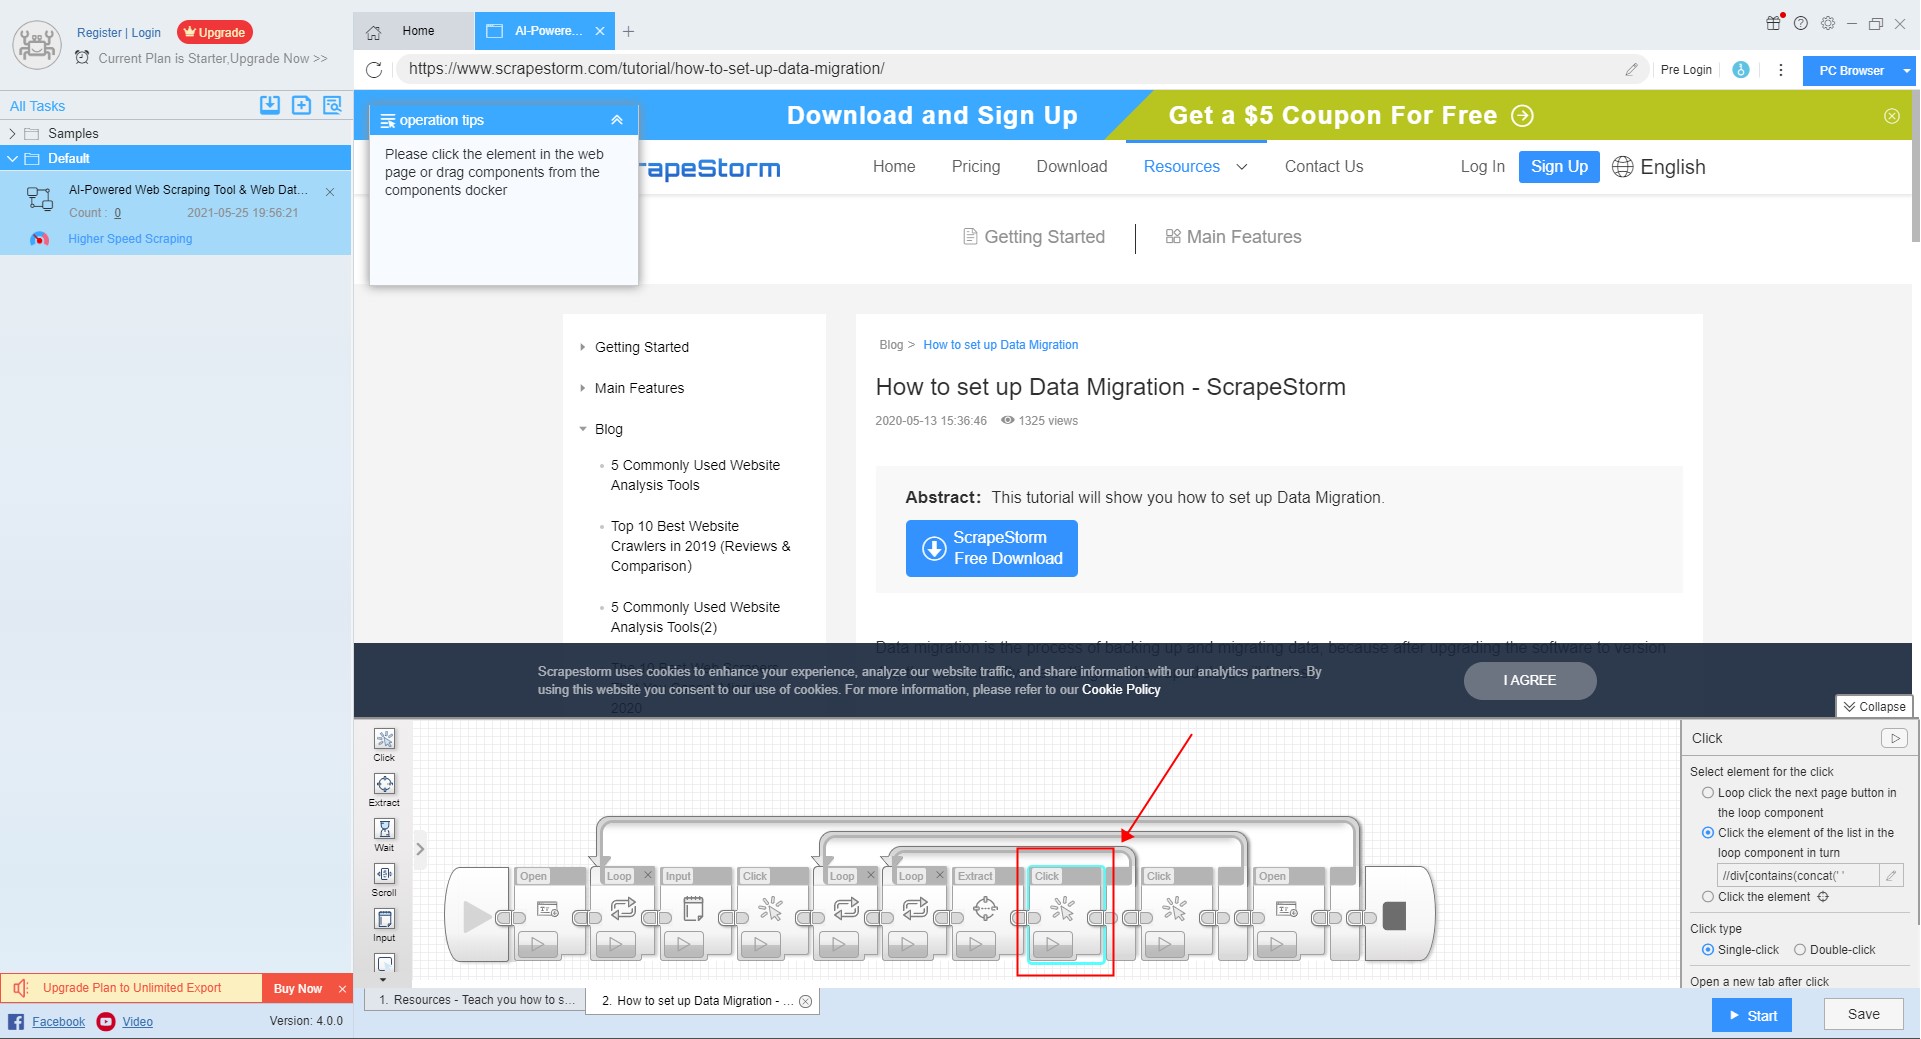
4. Set the fields of the details page
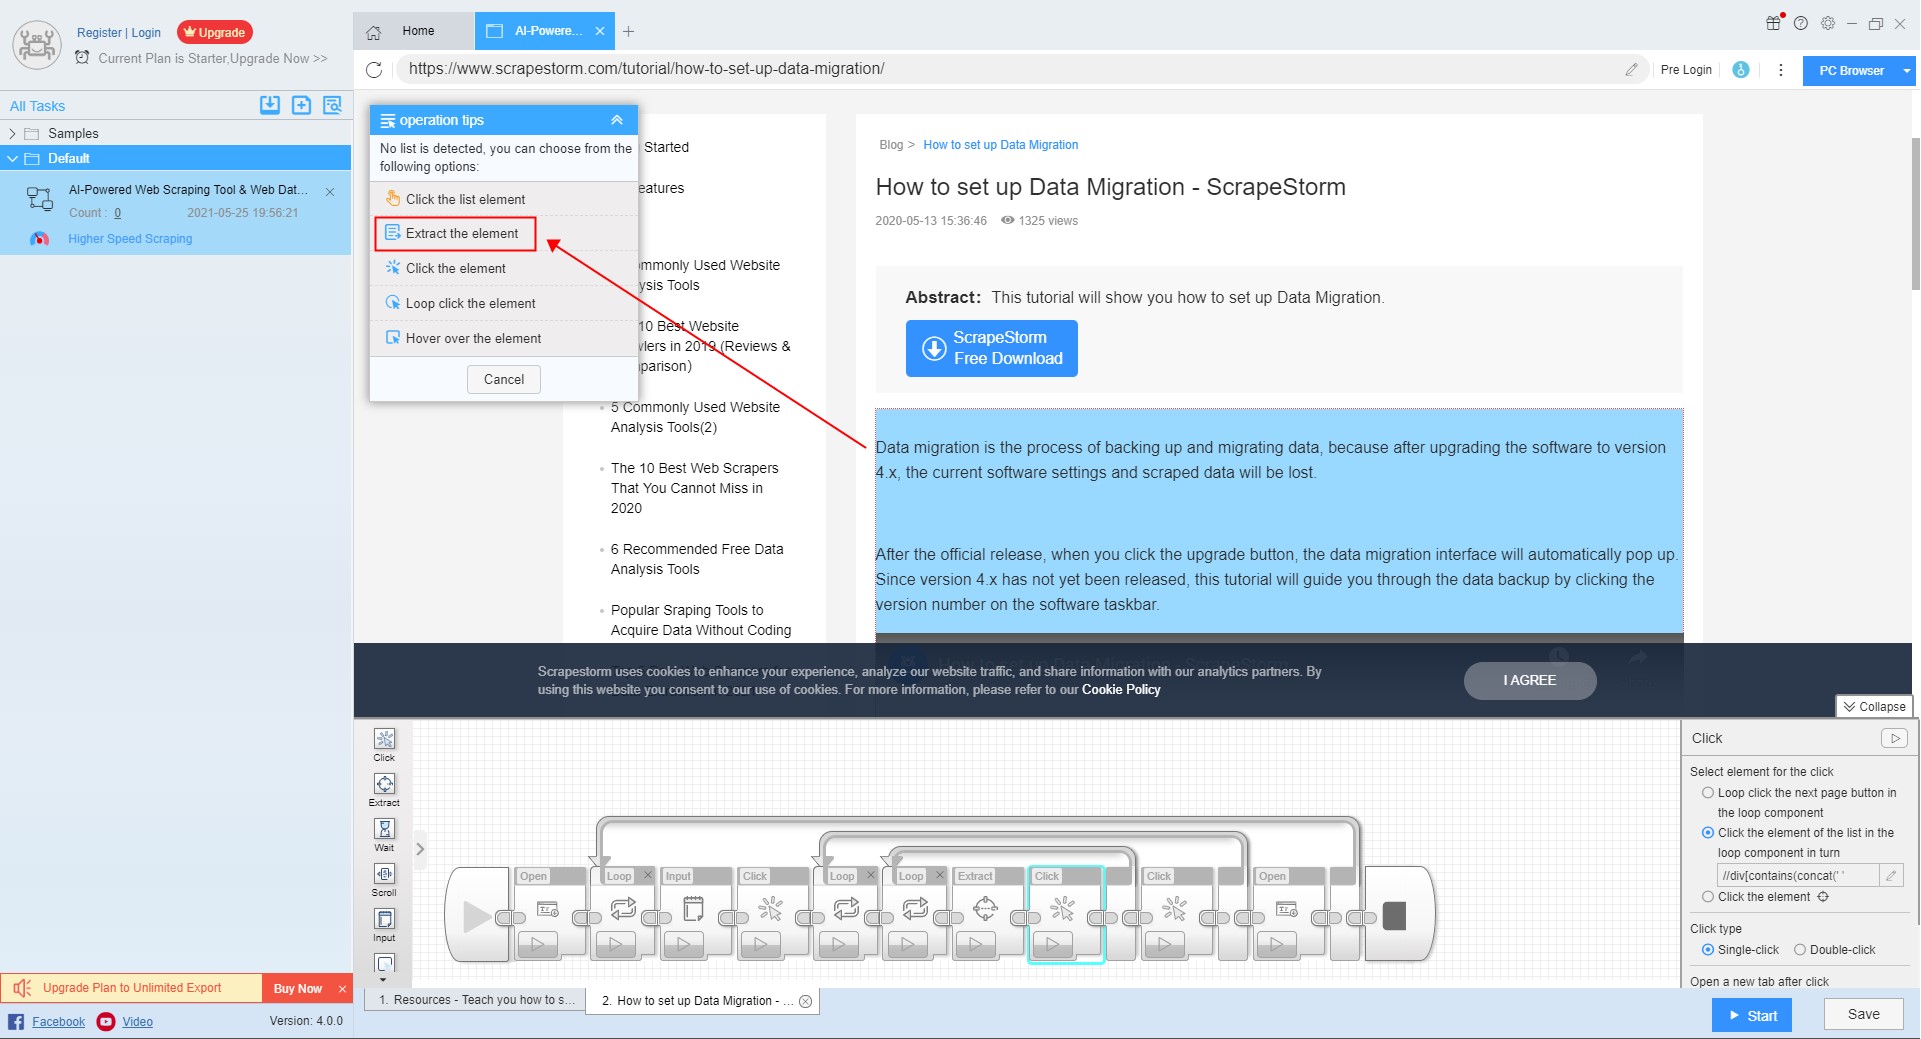
Click the data that needs to be scraped on the page, and then click \”Extract the element”\ in the operation tips, and then the data setting can refer to the setting of the list page.
For more details, please refer to the following tutorial:
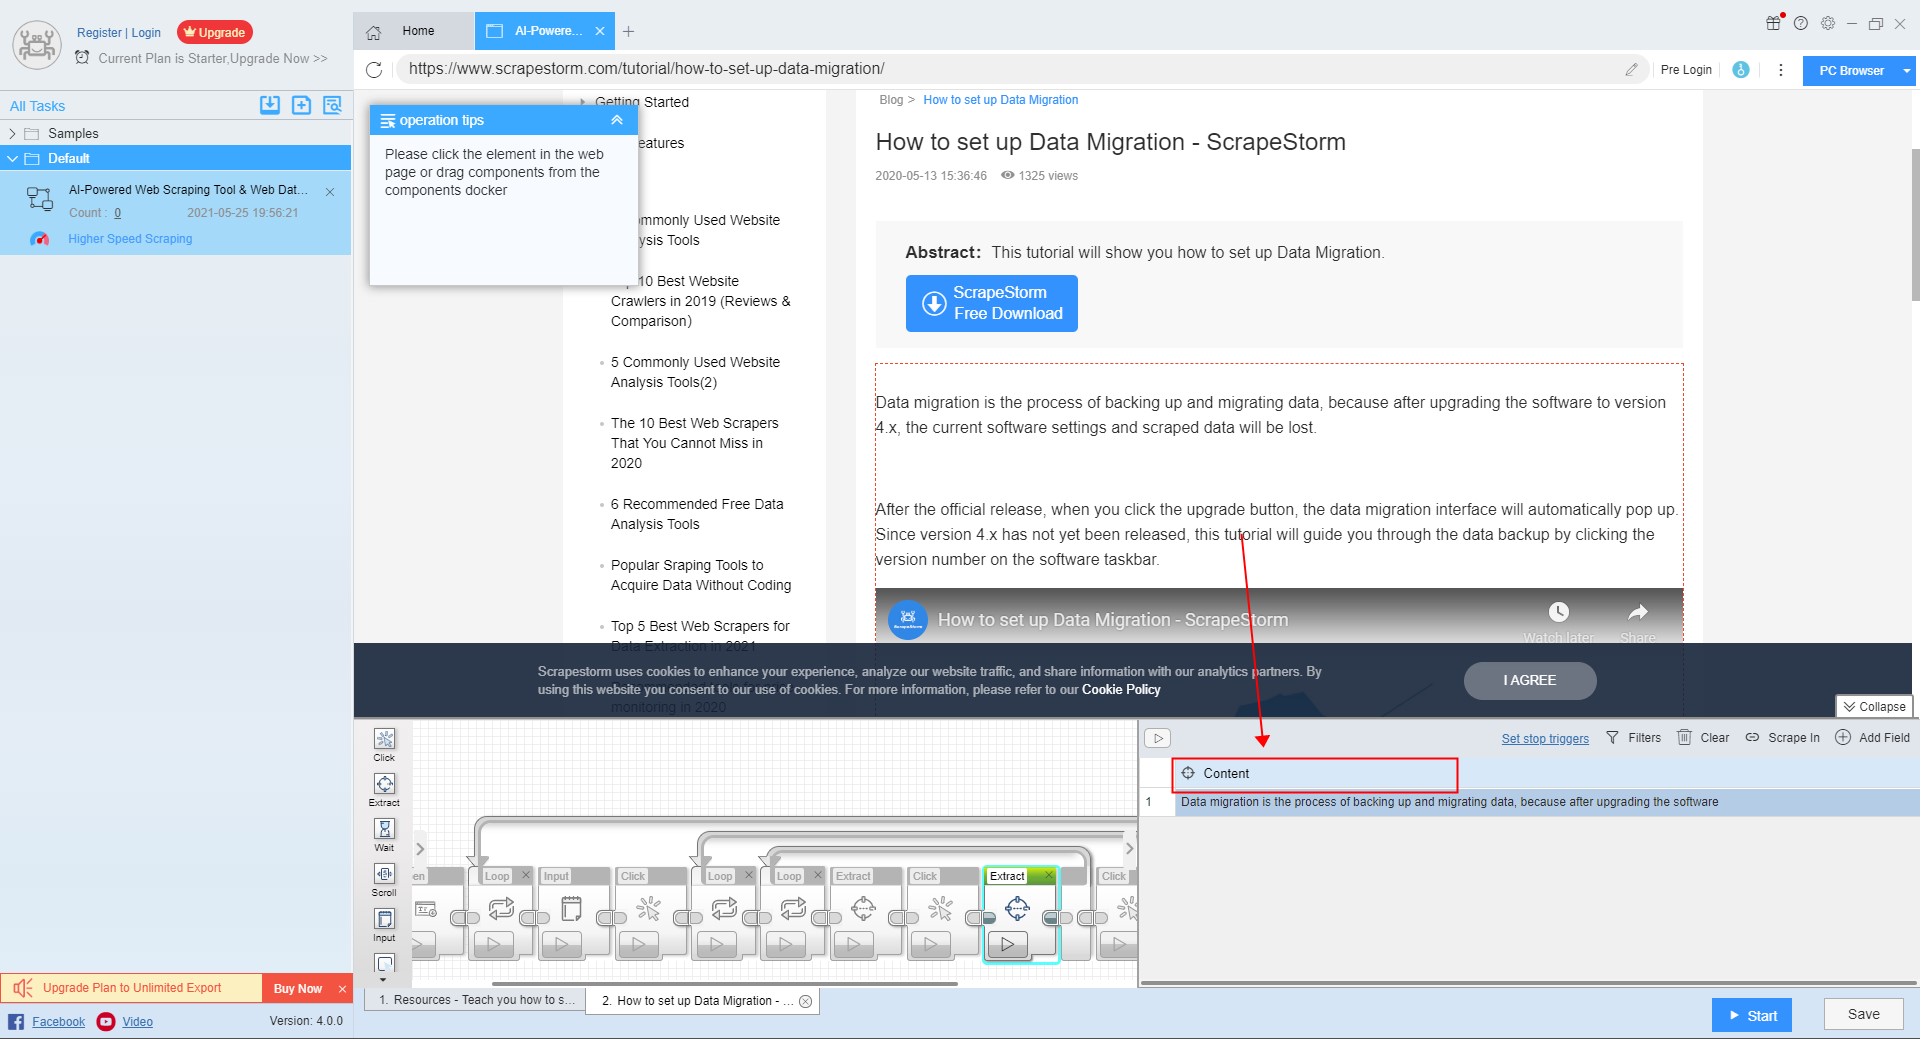
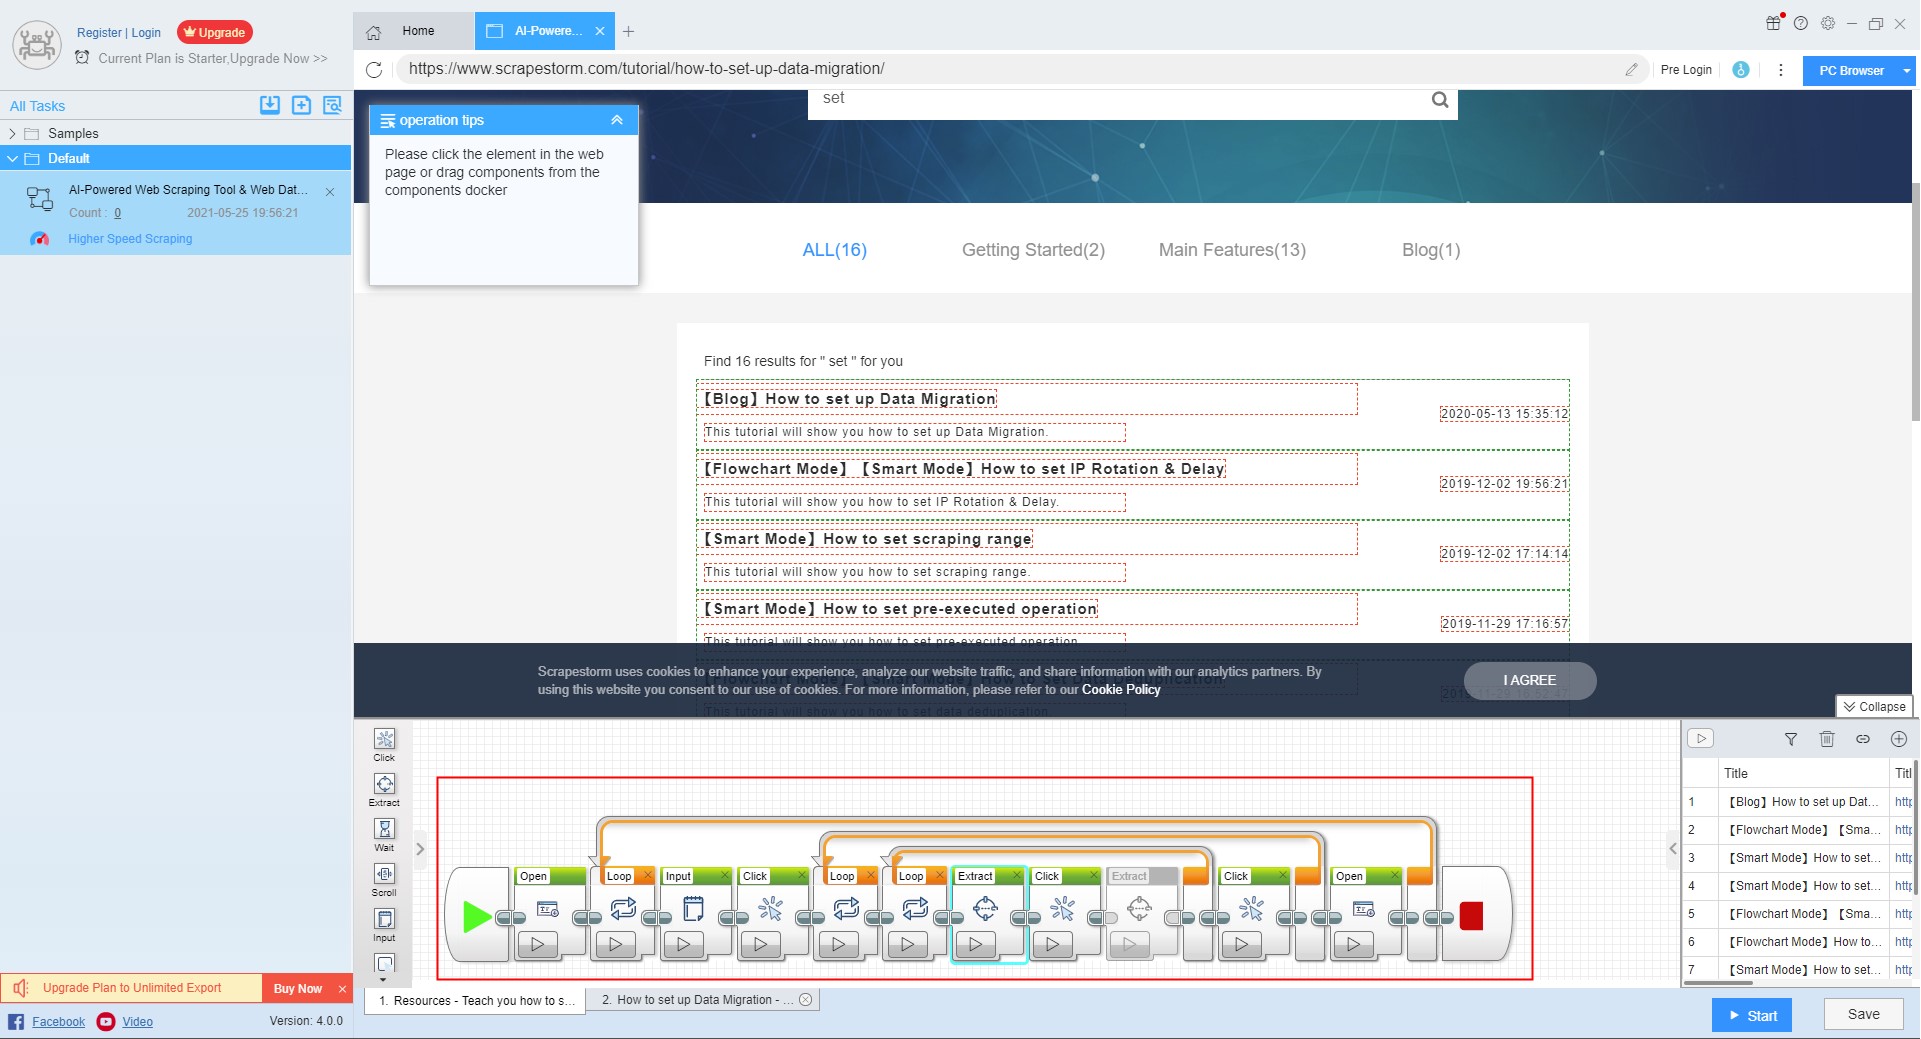
5. Complete component process
Step 3: Set up and start the scraping task
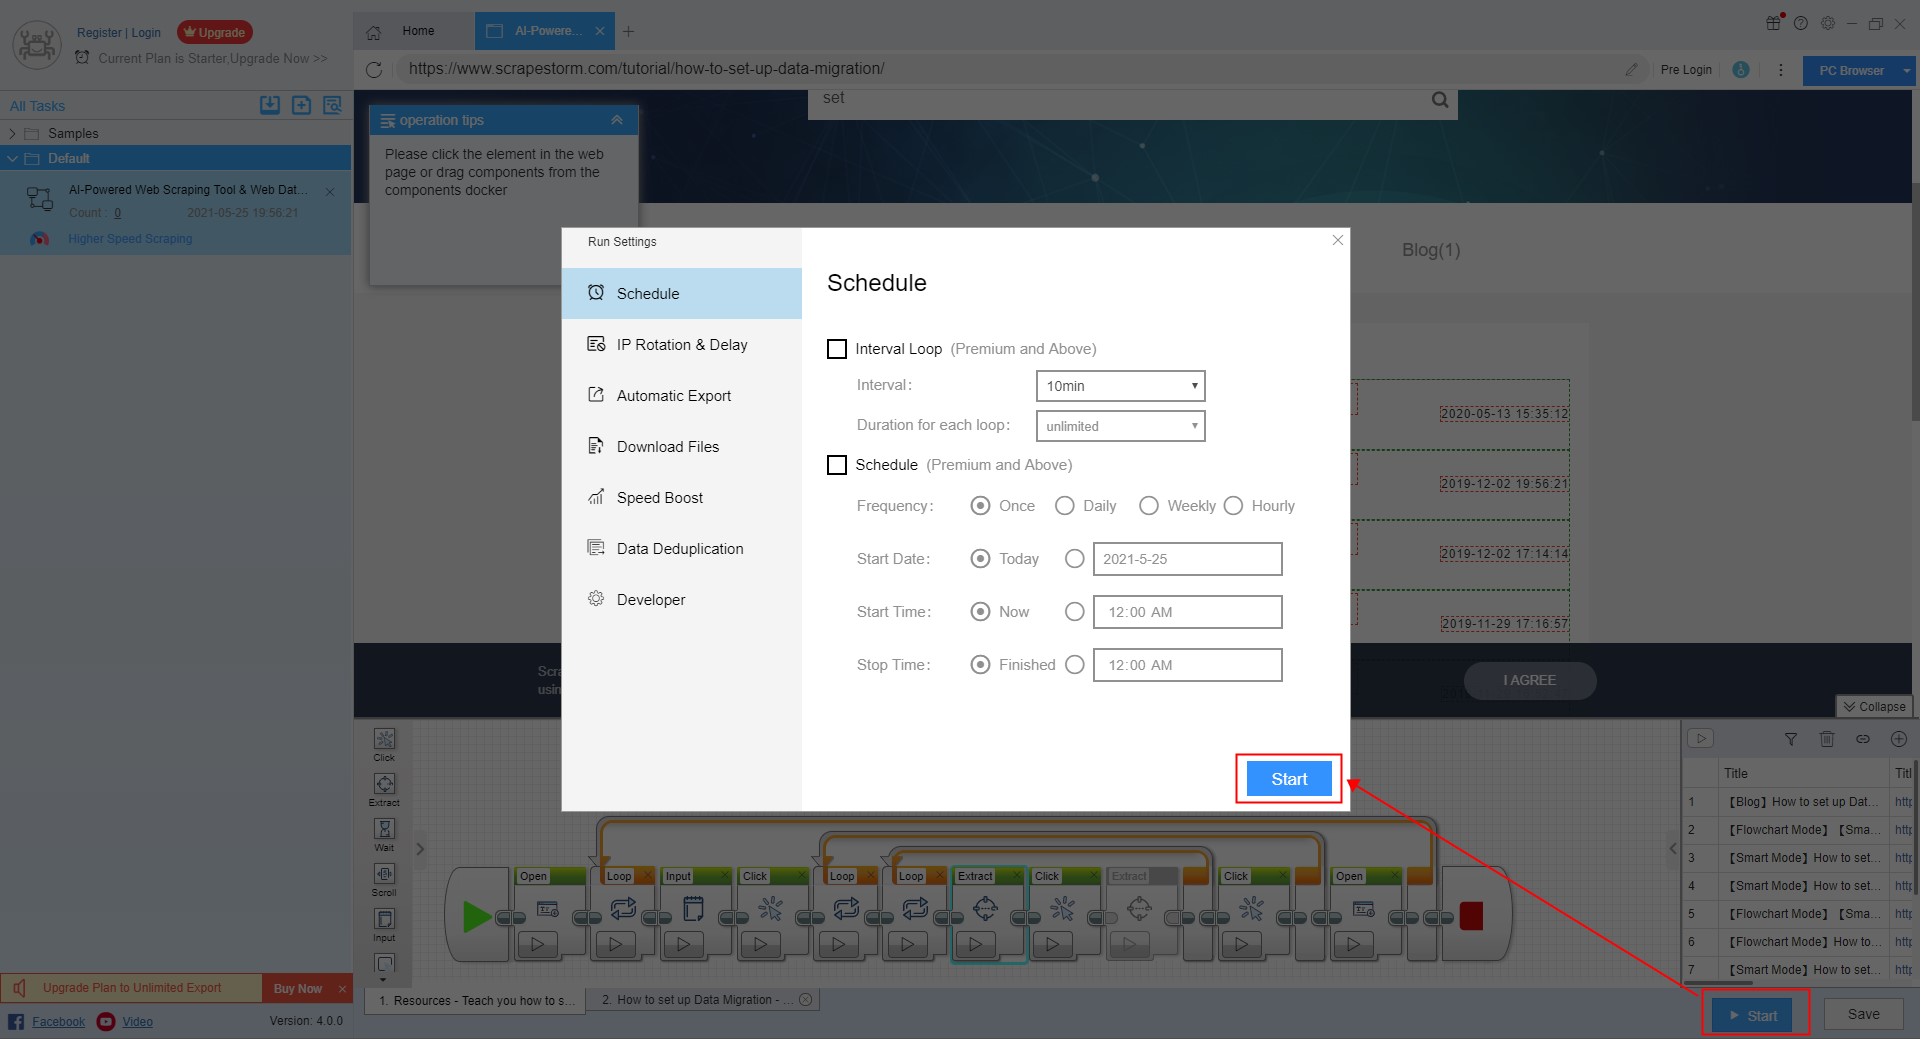
1. Start the scraping task
Click the “Start” button to perform some advanced settings in the running settings, including the functions of “Schedule, IP Rotation & Delay, Automatic Export, Download files, Speed Boost, Data Deduplication, and Developer”.
Click here to learn more about Schedule.
Click here to learn more about Automatic Export.
Click here to learn more about Download Images.
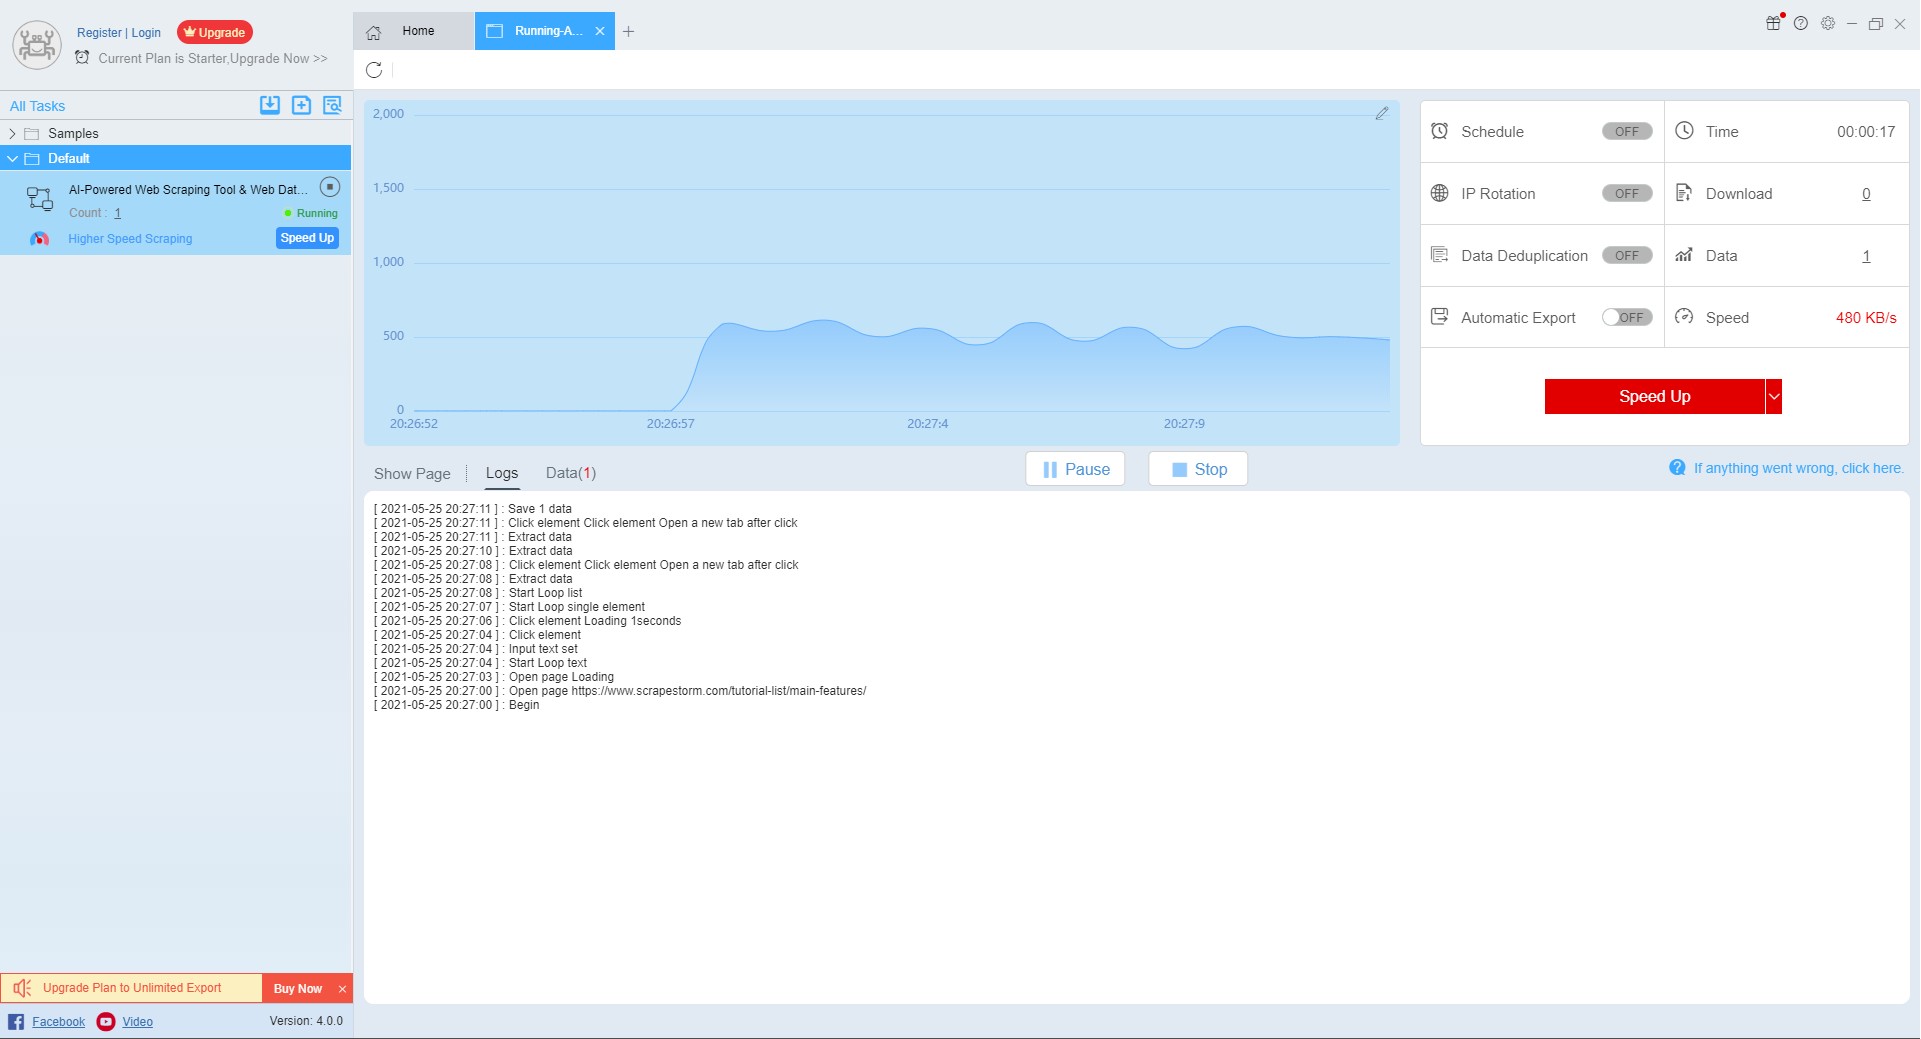
2. Run tasks to scrape data
After the task is started, the data will be automatically scraped. From the interface, you can intuitively see the program running process and the scraping result, and there will be a reminder after the scraping is completed.
Step 4: Export and view the data
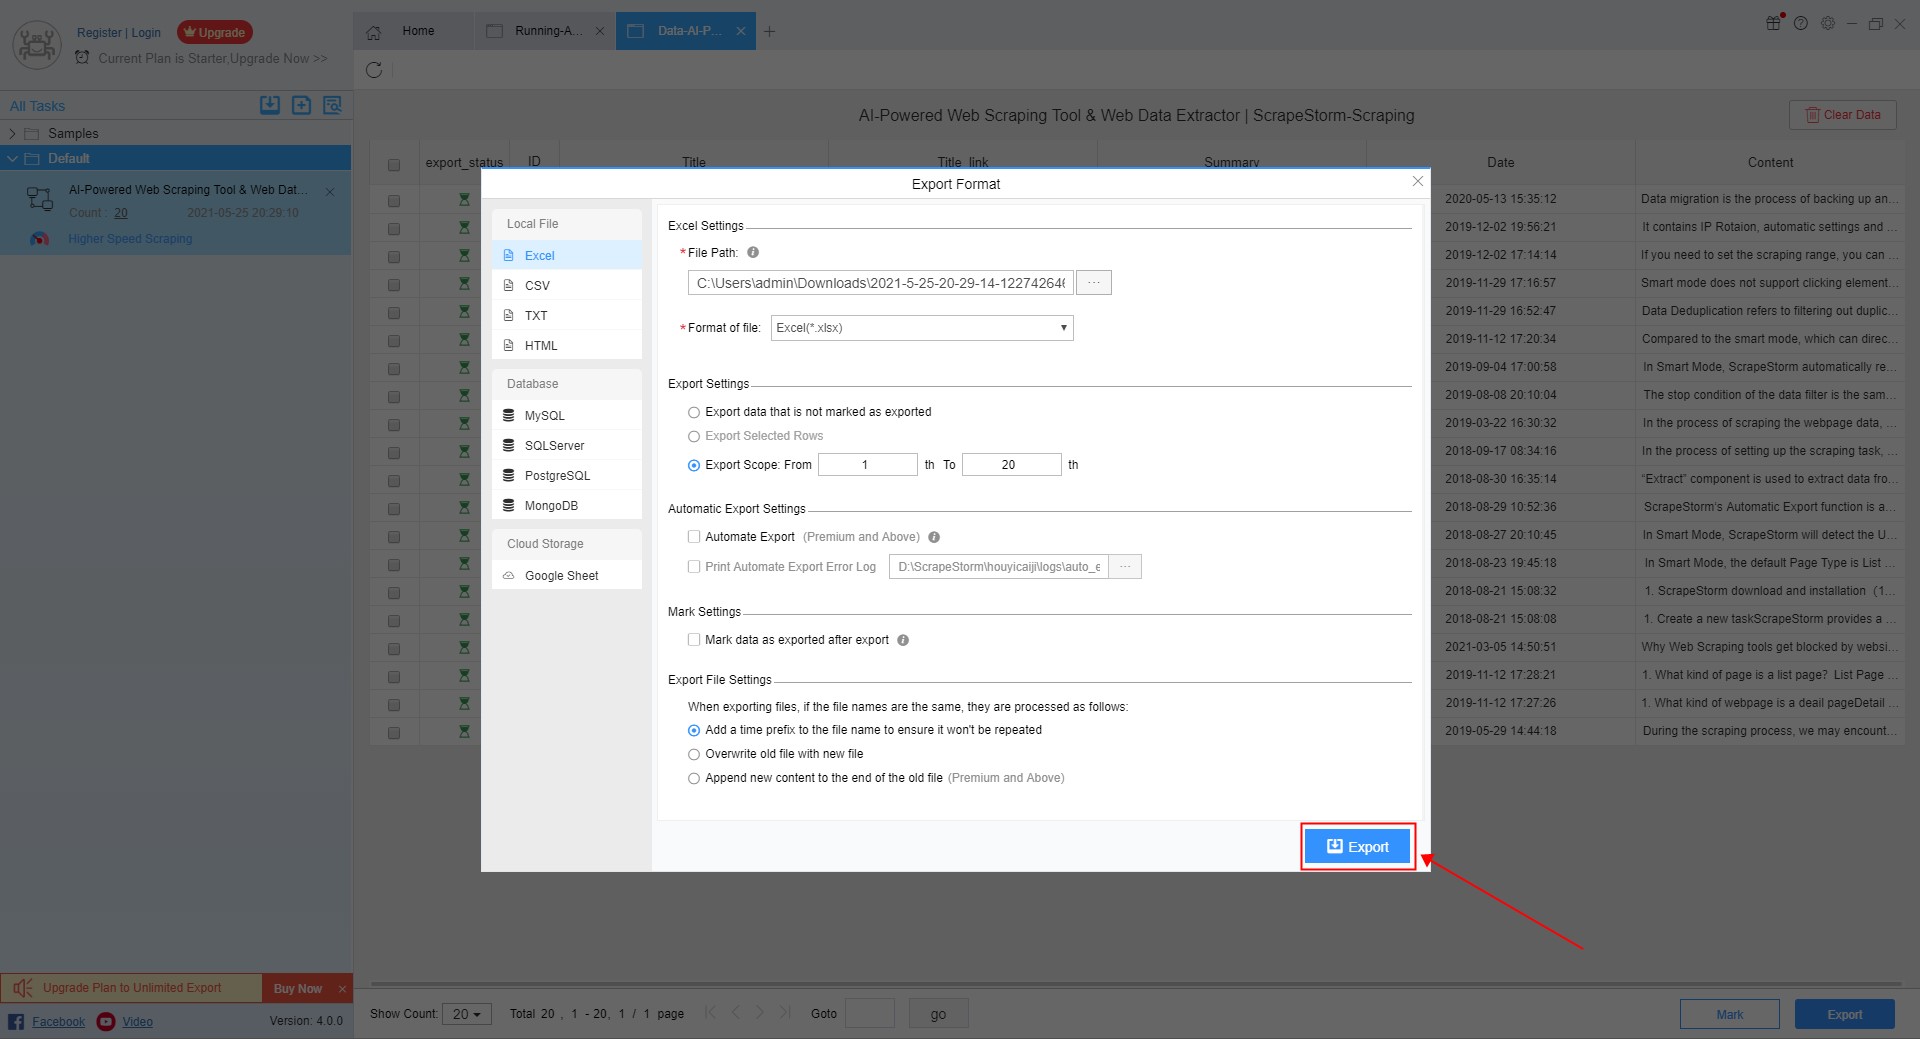
After data scraping is completed, you can view and export the data. ScrapeStorm supports multiple export methods (manual export to local, manual export to database, automatic export to database, automatic export to website) and export file formats (EXCEL, CSV, TXT, and HTML).
It also supports exporting the specific number of items, you can select the number of items you want to export, and then click \”Export”\.
