【Smart Mode】【Flowchart Mode】How to set up Automatic Export | Web Scraping Tool | ScrapeStorm
Abstract:This tutorial will show you how to automatically export the data. ScrapeStormFree Download
ScrapeStorm‘s Automatic Export function is an advanced feature that allows users to automatically export data to the database. That is, during the running of the task, each new data is automatically exported to the database, and the data does not need to be exported until the task is finished.
Step 1:
Users of Premium Plan and above can use the Automatic Export function. Click on “Start” button in the lower right corner, and then select “Automatic Export”.
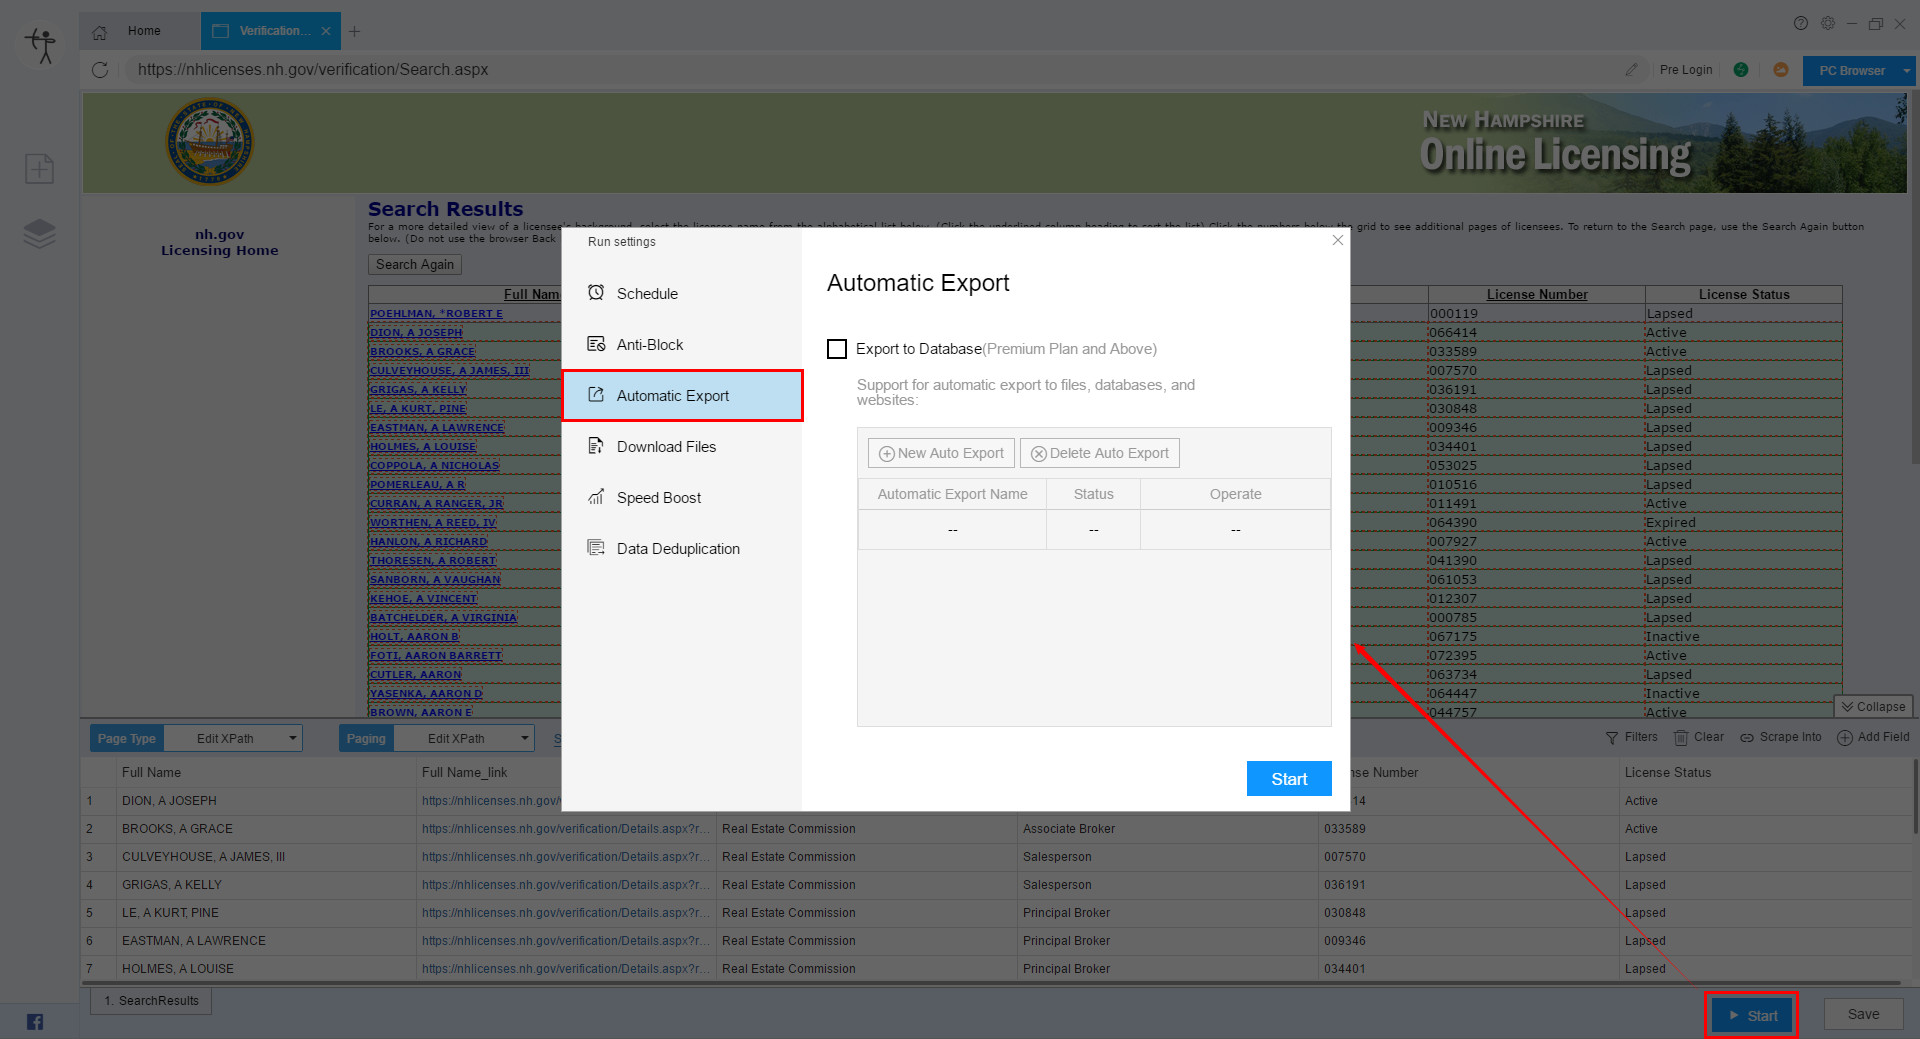
Check “Export to Database”, and click the “New Auto Export” button to create a new automatically exported database.
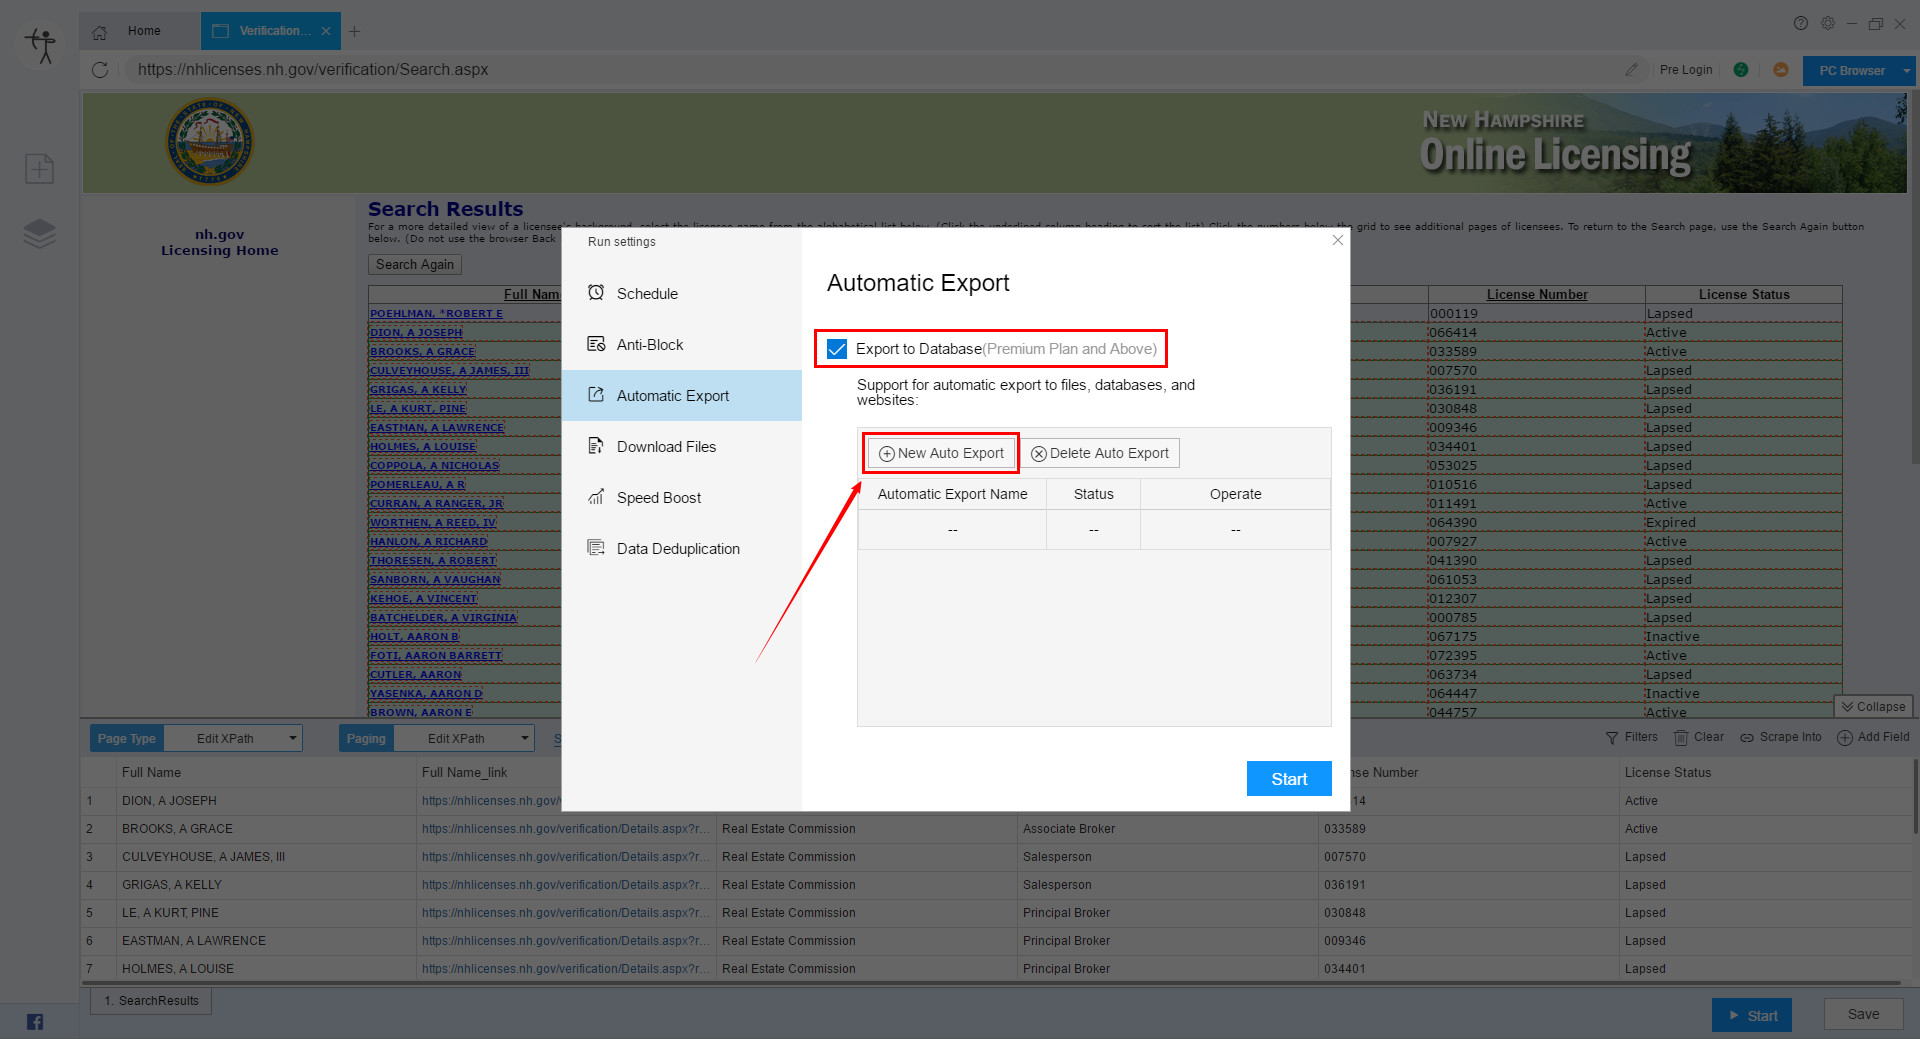
After clicking this button, we will jump to the export interface, we can choose the format or database to be exported for setting.
Step 2:
(1) Automatically export to file
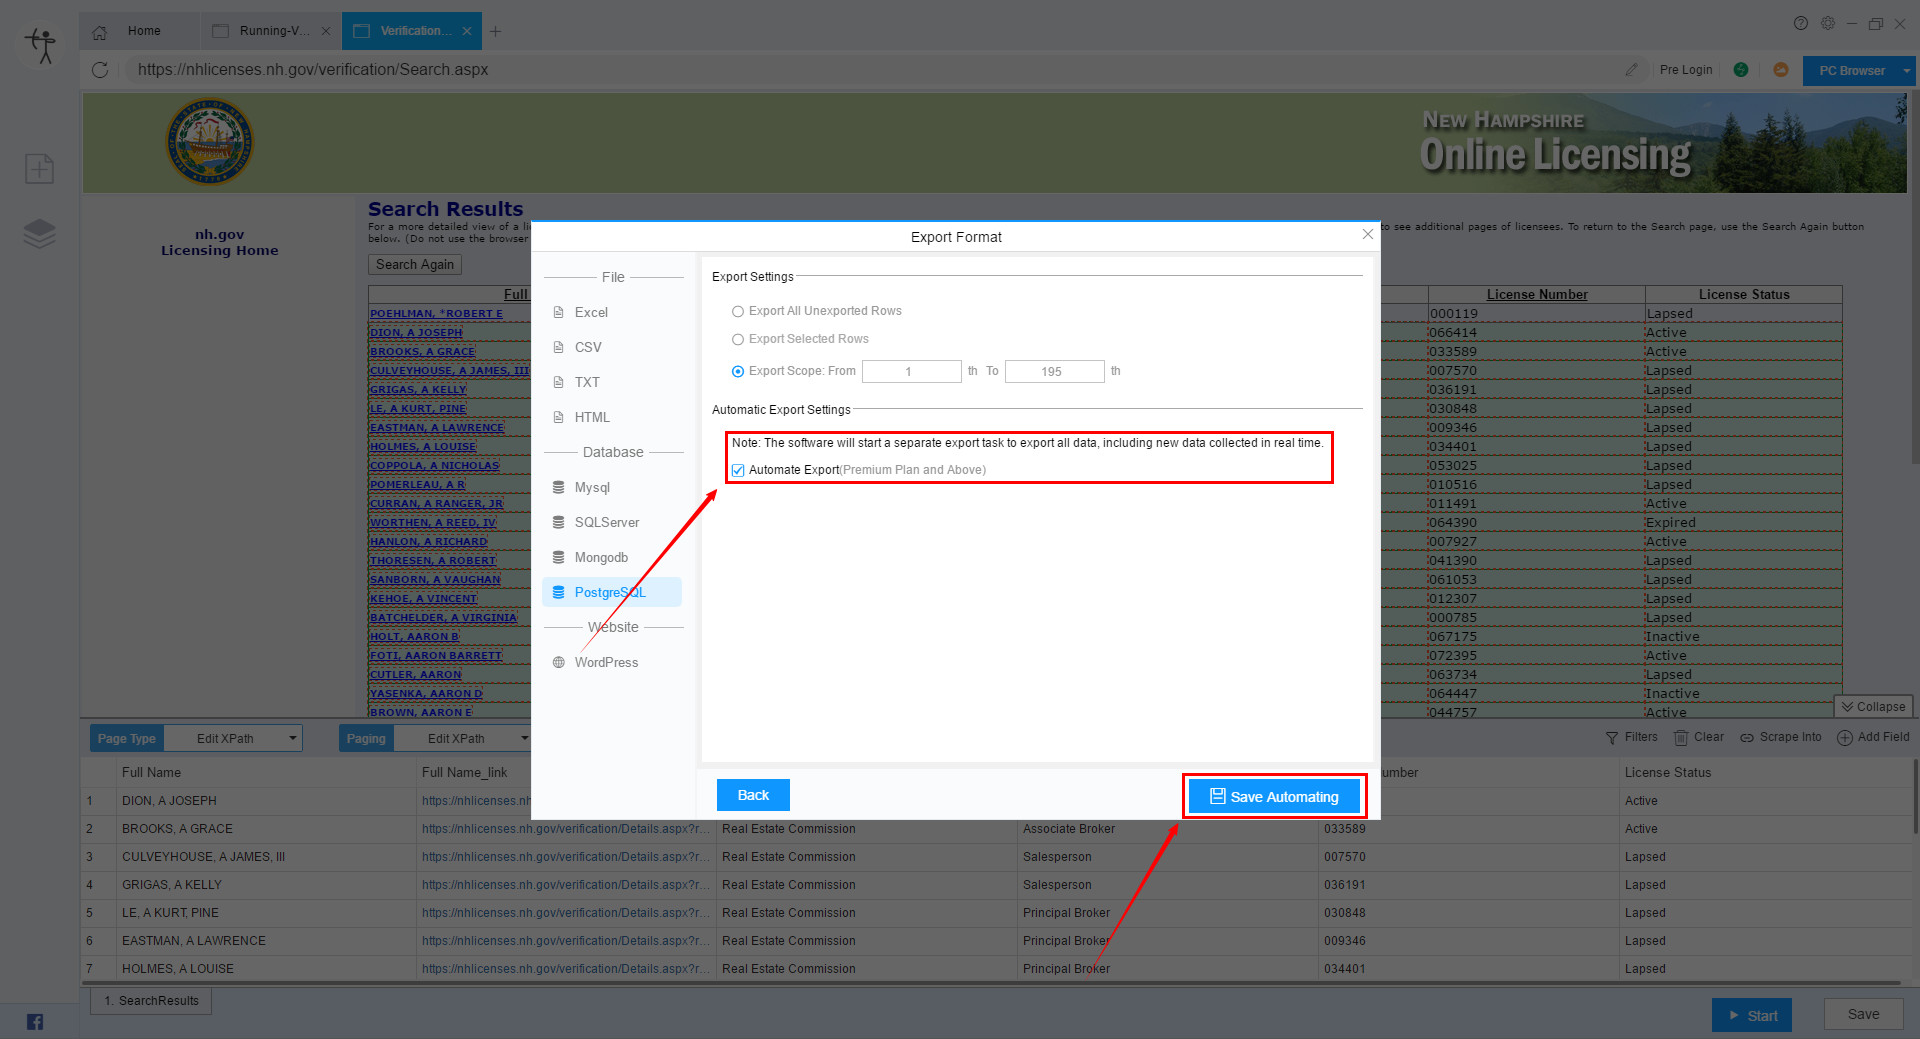
If you need to automatically export to files, including Excel, TXT, CSV and HTML, select the format and then check “Automate Export” and click “Save Automating”.

(2) Automatically export to database
ⅰ. Export to Mysql
If you need to automatically export to the database Mysql, click here to see the specific steps.
Then check “Automate Export” and click “Save Automating”.

ⅱ. Export to SQLServer
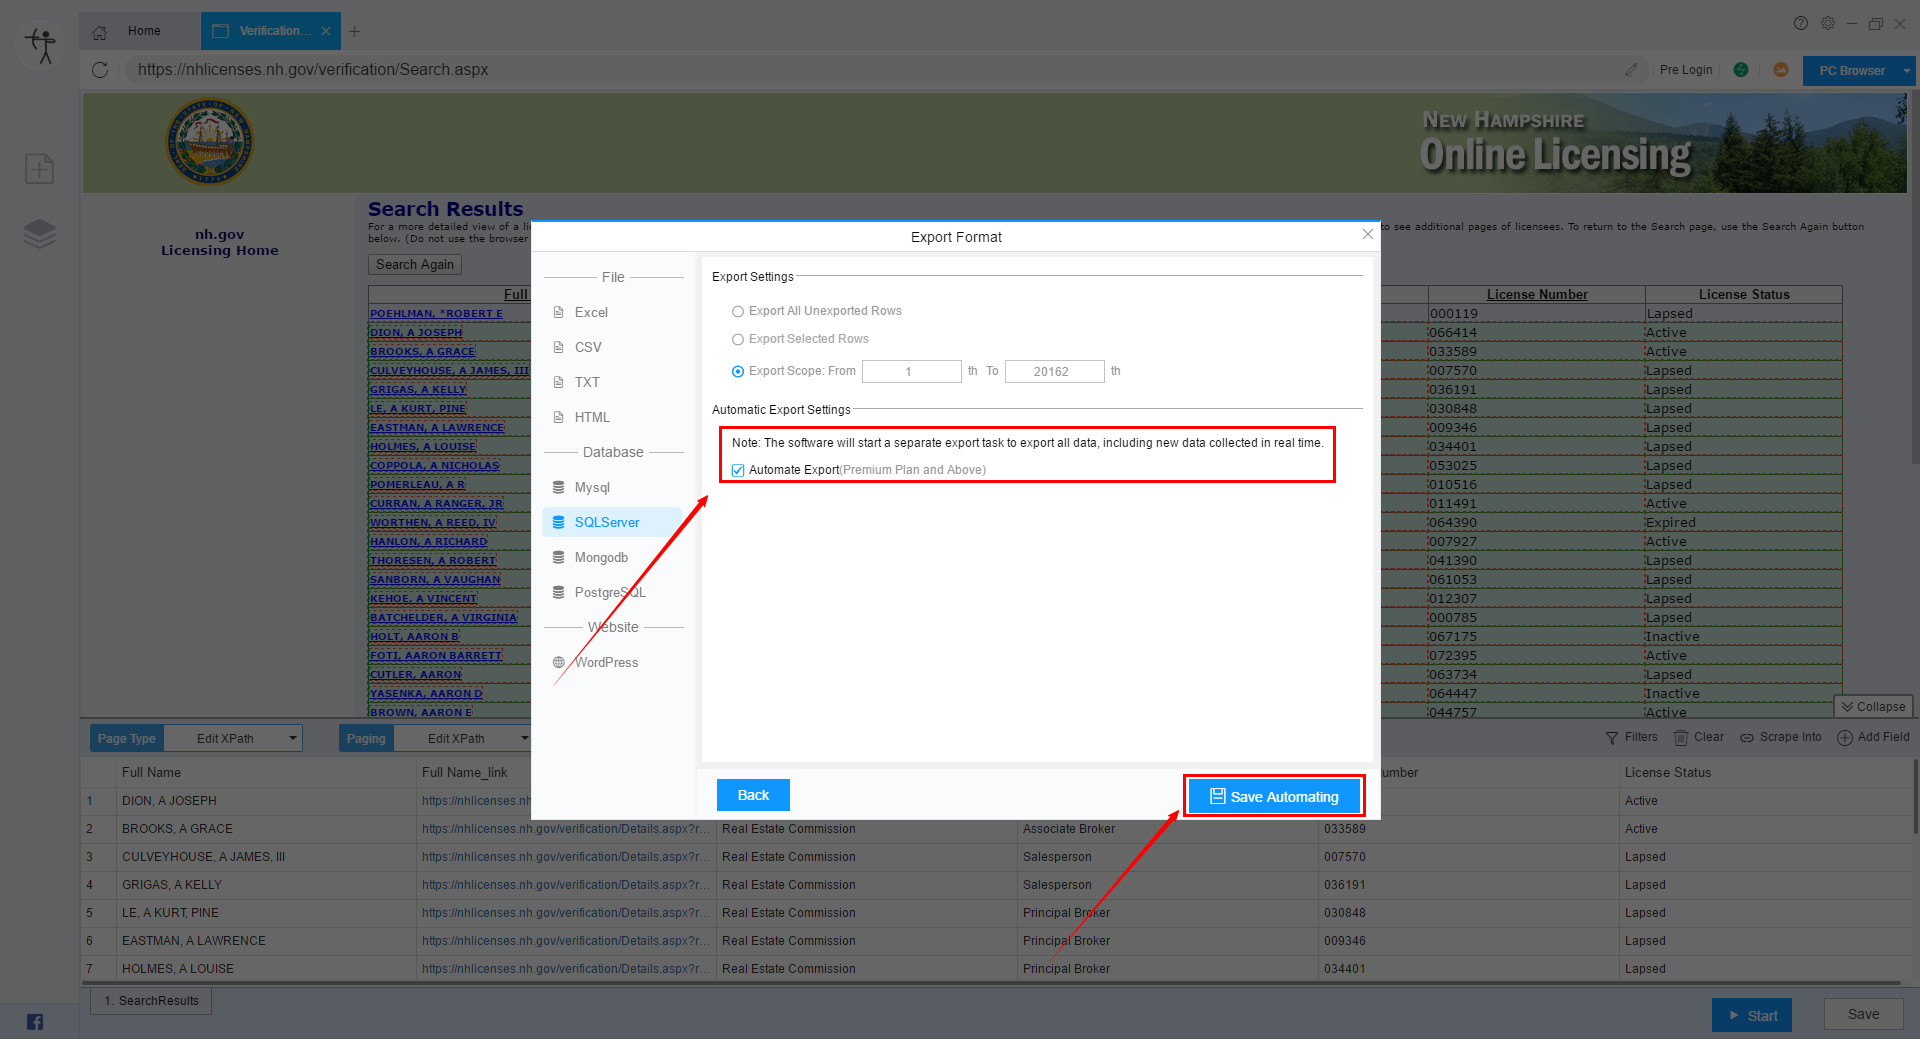
If you need to automatically export to the database SQLServer, click here to see the specific steps.
Then check “Automate Export” and click “Save Automating”.
ⅲ. Export to Mongodb
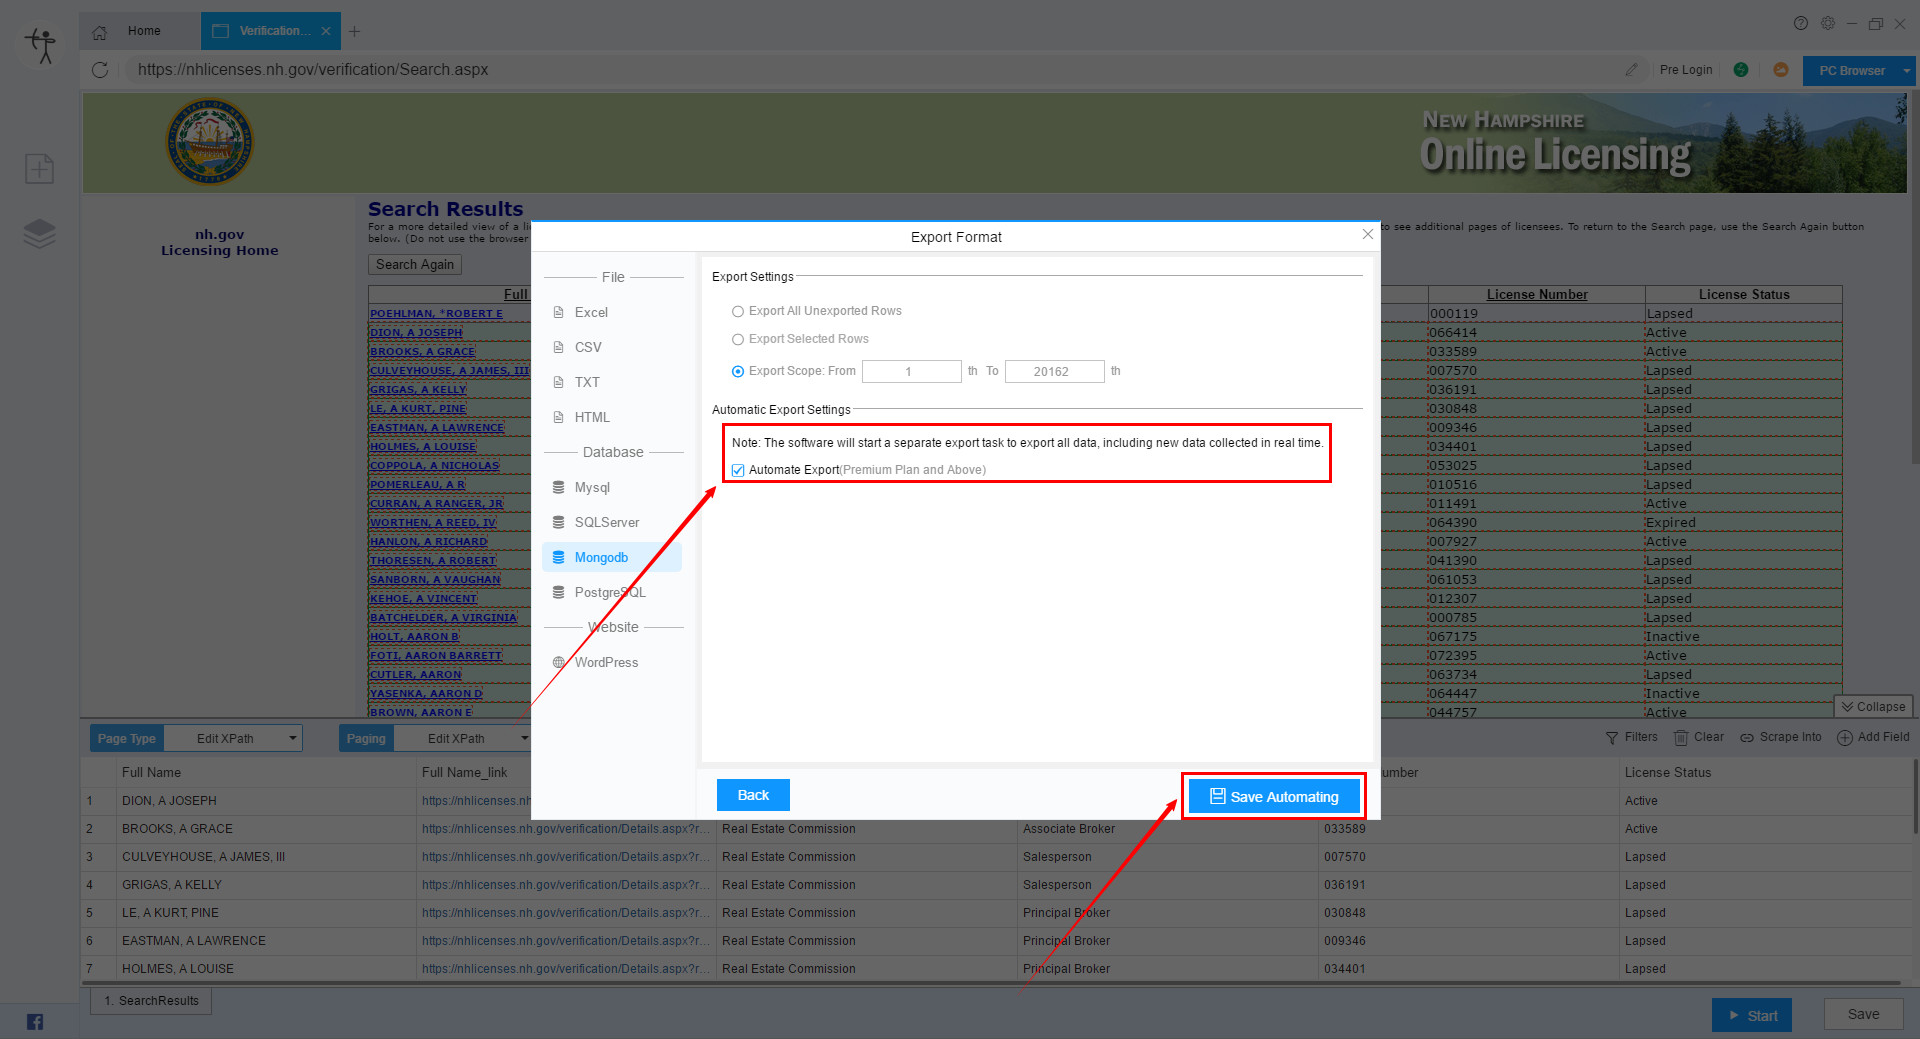
If you need to automatically export to the database Mongodb, click here to see the specific steps.
Then check “Automate Export” and click “Save Automating”.
ⅳ. Export to PostgreSQL
If you need to automatically export to the database PostgreSQL, click here to see the specific steps.
Then check “Automate Export” and click “Save Automating”.
(3) Automatically export to website
If you need to automatically export to WordPress, click here to see the specific steps.
Then check “Automate Export” and click “Save Automating”.

Step 3:
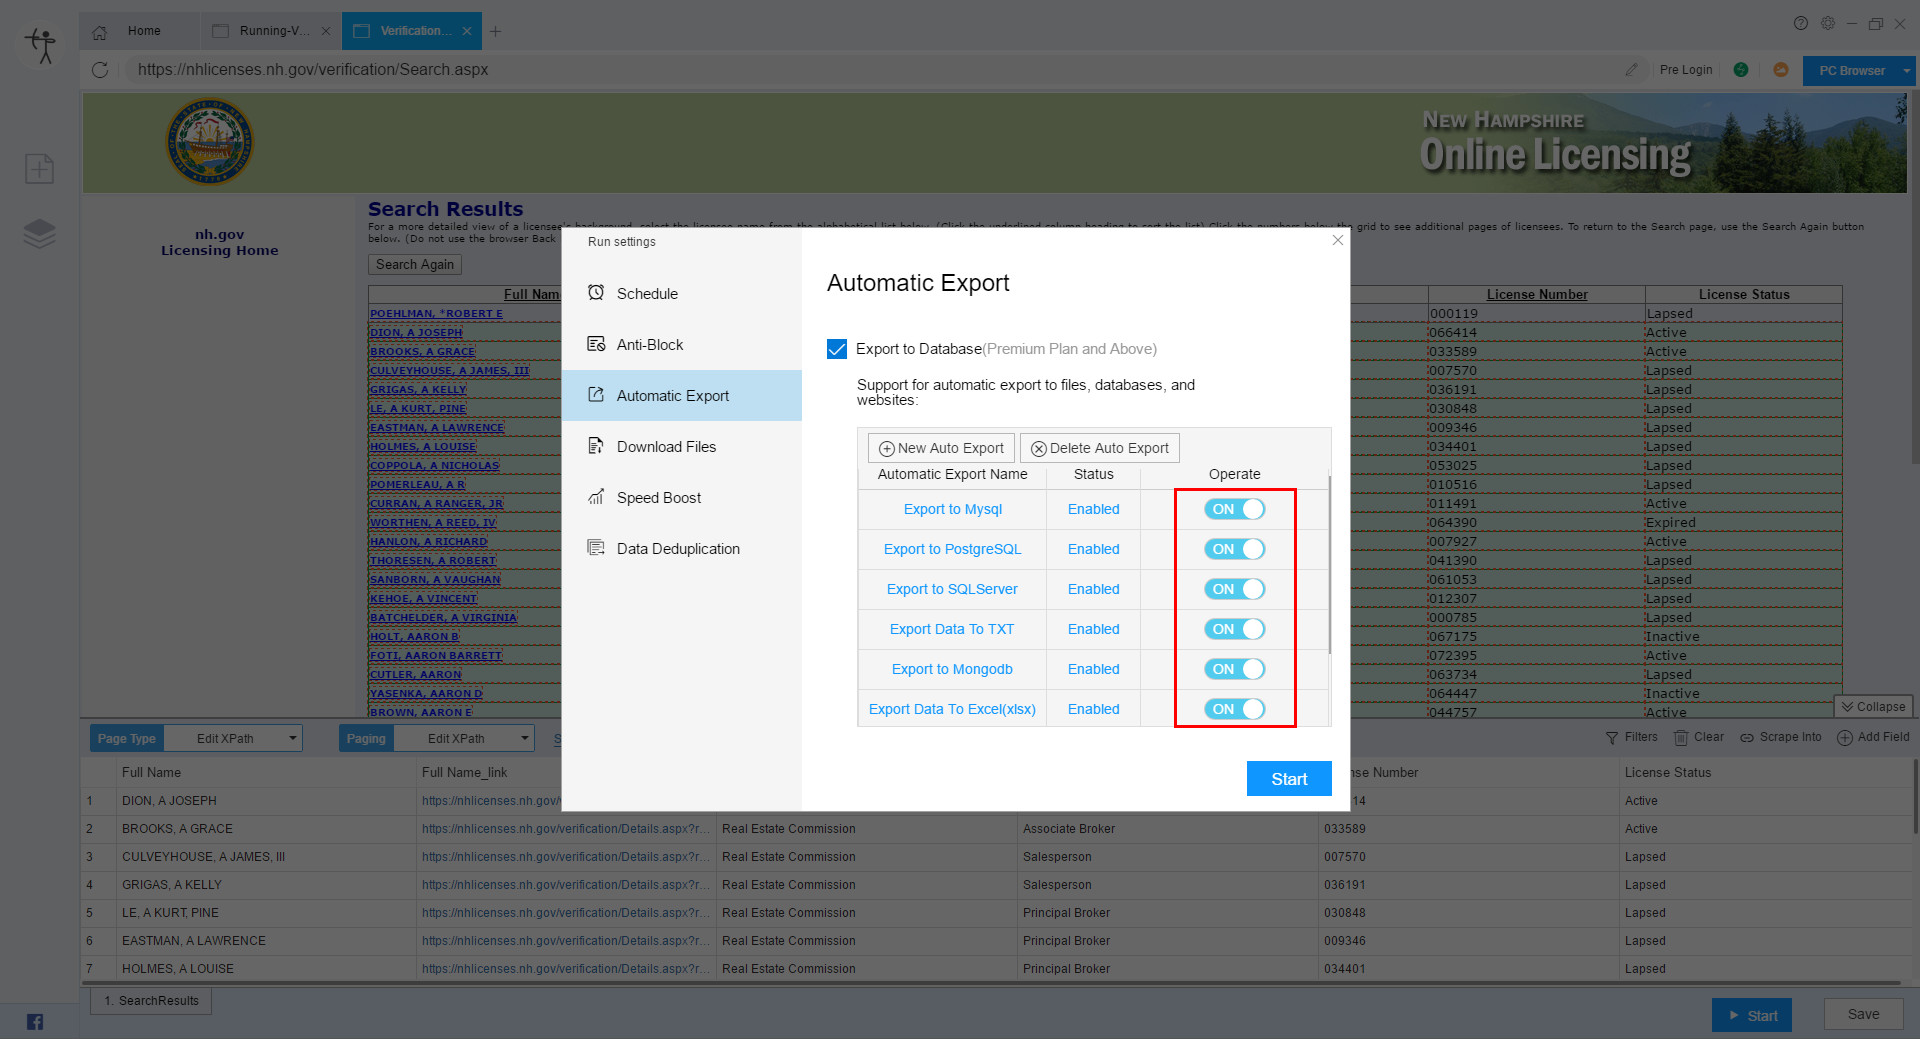
After returning to Automatic Export interface, we can see the configuration of the files and databases we just set. If we don’t need to export to that many databases, we can turn off some.
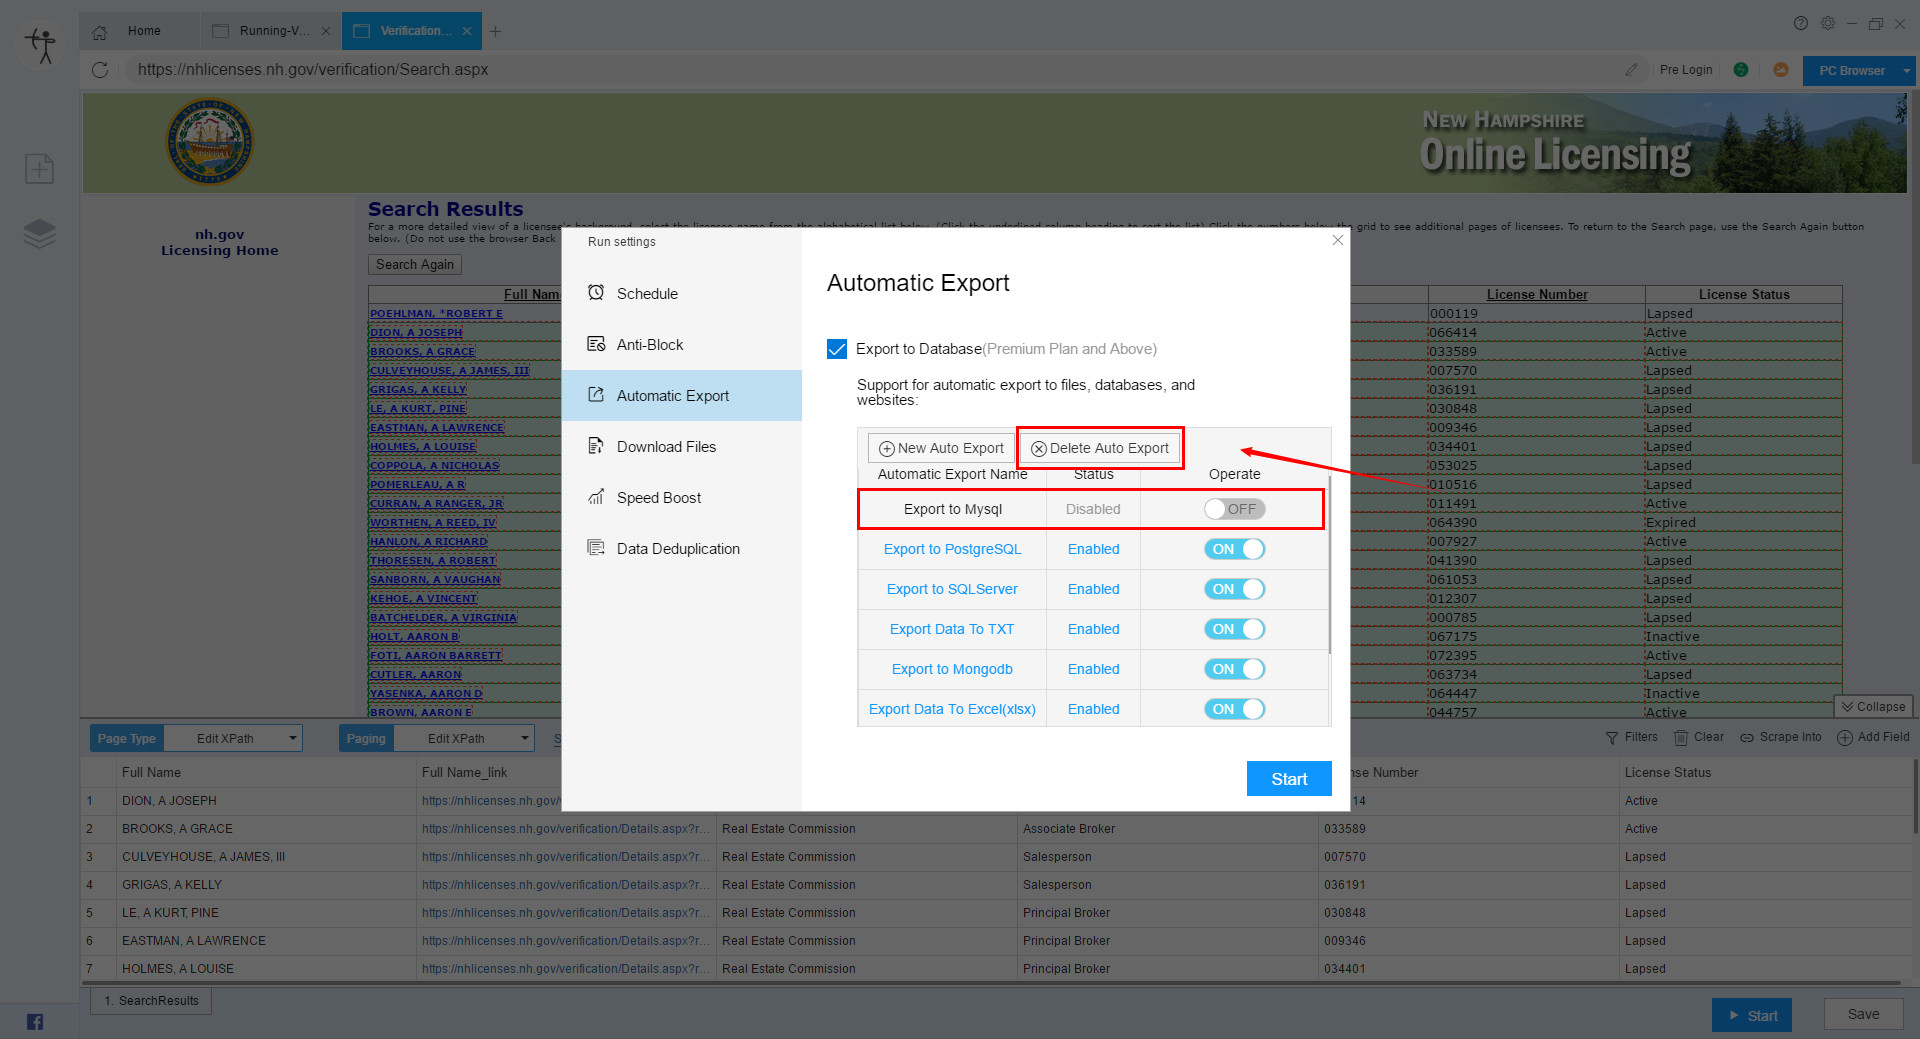
If we need to delete one, we turn it off first, and then select it and click the “Delete Auto Export” button.
Step 4:
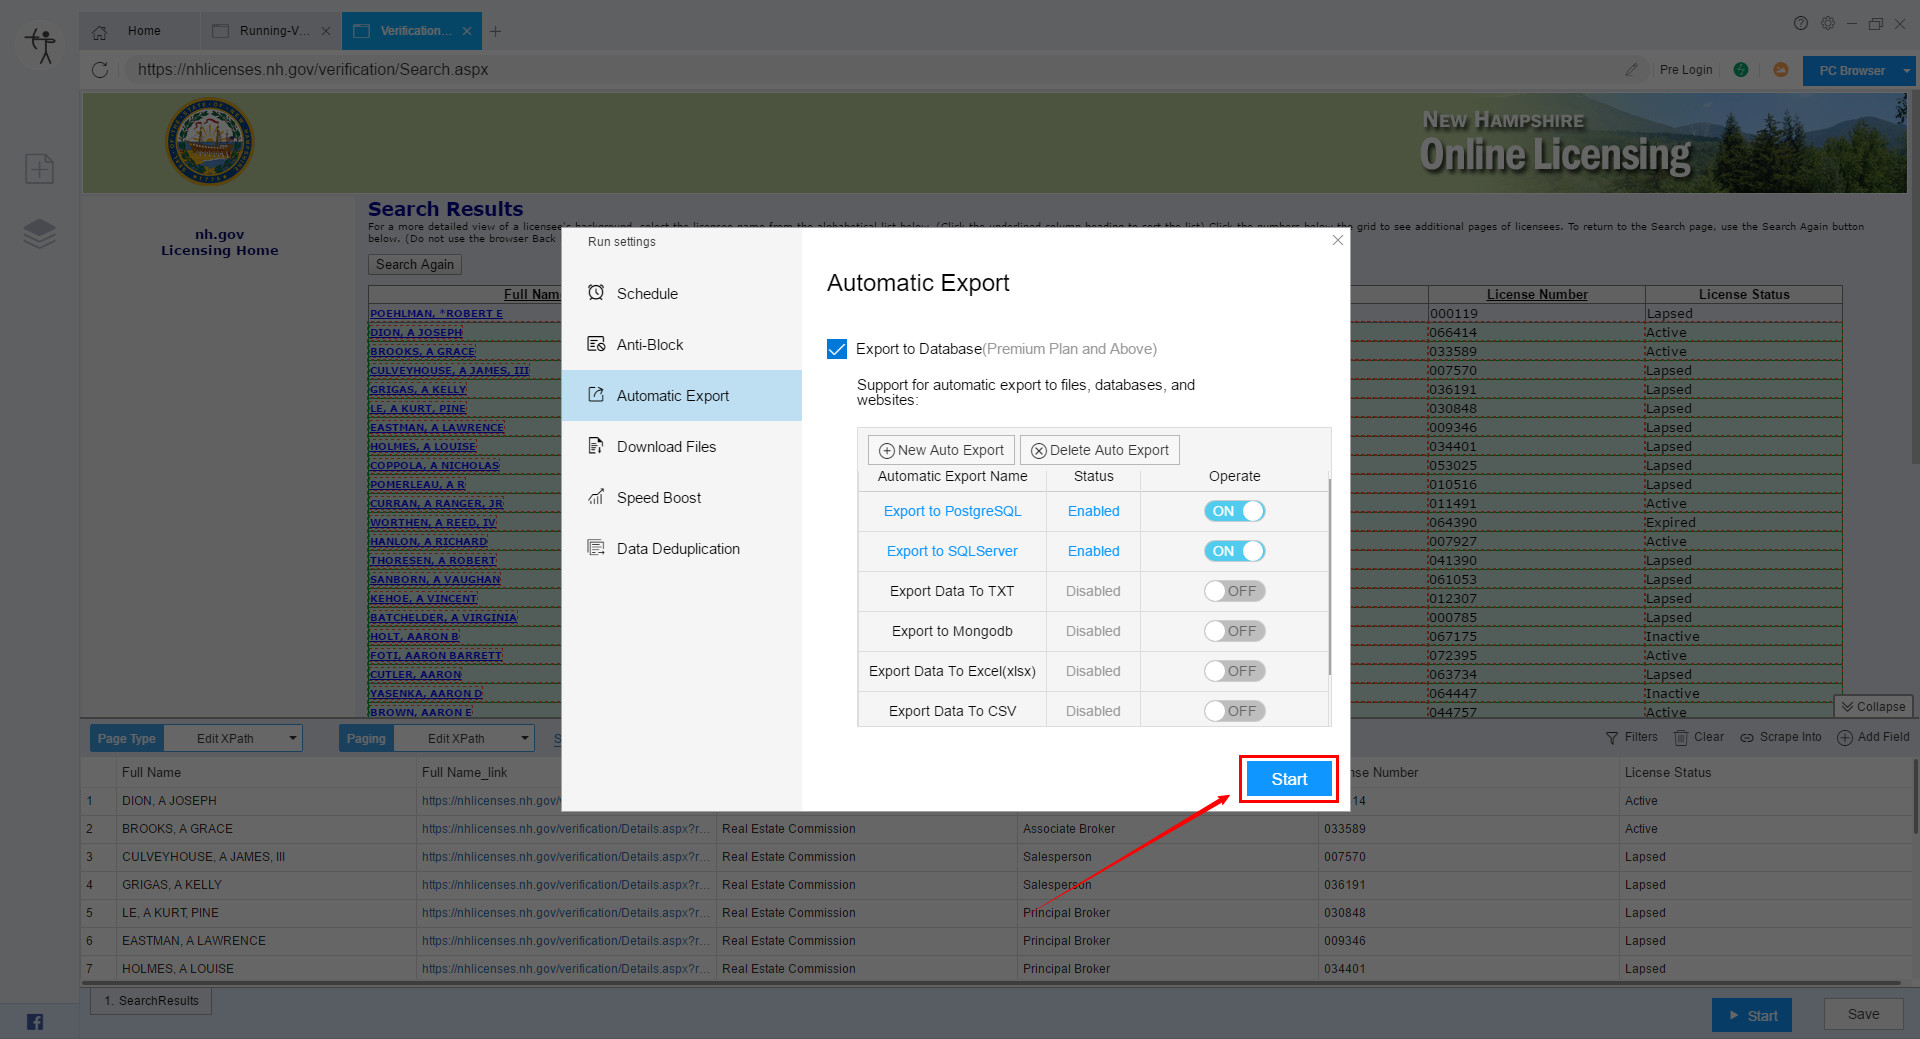
In this way, we have completed the automatic export settings, we can directly click to start the data data, the data can be scraped out to the file or database in the scraping process.
Automatic Export and Scheduled function can greatly improve user’s work efficiency and save users’ time. It is especially suitable for users who need to monitor data or sensation for a period of time.